From My Kitchen Pantry. Rich and Luscious Crème Pâtissière.


Creme Patisserie

This weekend we’re celebrating my husband’s birthday, and as always I’m baking a celebratory cake. Last year we embarked on a serious chocoholic indulgence with a Chocolate Mousse Torte with Candied Morello Cherries and Hazelnut Praline, this year it’s to be something lighter – a berry and cream filled Pavlova. Of course for my family one regular sized pavlova just won’t do so I doubled the recipe. What to do with eight left over eggs? Make Crème Pâtissière; an idea initially inspired some time ago by Ana over at her blog Delicious By Ana.

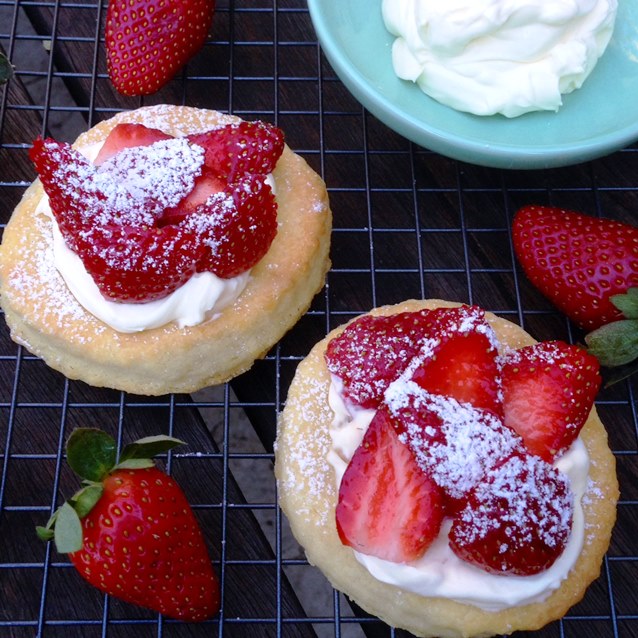
Crème Pâtissière is a ludicrously rich and luscious French pastry cream or custard that can be used to fill all manner of desserts, tarts and cakes. Think simple fruit tarts, choux pastry puffs, mille feuille, éclairs, Napoleons and layer cakes.  In my family it is also enjoyed inelegantly and stealthily; by the spoonful, straight from the fridge. And they thought I hadn’t noticed.

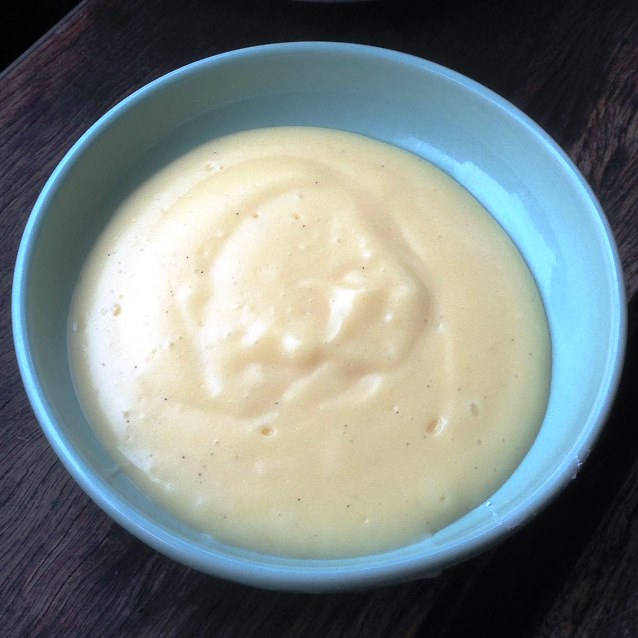
The ingredients are simple pantry items that co-incidentally also happen to be gluten free.  Milk, sugar, cornflour and vanilla. Perhaps a little butter for added richness and sheen.  Of course you can also flavour it with a tablespoon or two of your  favourite liqueur right at the very end. Speaking from experience Cointreau and Grand Marnier work particularly well.

Crème Pâtissière
Makes 3 cups
Recipe can be halved or doubled depending on quantity required.

2 cups (500 ml) milk
4 yolks from large eggs
125 g sugar
50 g cornflour
1 vanilla bean
50 g unsalted butter (optional)
1 tablespoon Cointreau or another favourite liqueur (optional)

USE the  tip of a sharp knife to split the vanilla bean lengthwise. Scrape along the cut surface to collect the seeds. Combine the milk, vanilla seeds and pod in a large heavy based saucepan and bring to a simmer.
WHILE the milk is heating, whisk the egg yolks with sugar in a large mixing bowl until pale, thick and creamy. Then add the cornflour and whisk to combine.
REMOVE the vanilla bean pod from the milk.  In a steady stream pour in half of the warm milk over the egg mixture and whisk until smooth. The heat will temper the eggs so that they are less likely to curdle when added to the remaining saucepan of hot milk and brought back to the boil.
POUR the egg mixture back into the saucepan with the remaining milk. Whisk quickly and constantly, over a medium low heat and bring the mixture mixture back to the boil. Remember to pay attention to the edges as you stir so the mixture doesn’t catch and stick to the bottom of the saucepan.
CONTINUE to whisk for another minute to cook the cornflour through. The mixture should  be very thick and smooth and a little difficult to stir.
REMOVE the saucepan from the heat.  If using the butter, allow the pastry cream to cool a little before gently stirring in a few cubes of butter at a time. The butter will give the pastry cream a richer taste and lovely sheen.
POUR the prepared pastry cream into a clean shallow baking dish and dust with icing sugar to prevent a skin from forming. Cover with cling wrap and cool completely, at least 2 hours. Refrigerate until needed, up to 3 days.
WHEN ready to use whisk the pastry cream to loosen a little. At this stage you can stir in a little liqueur if using. For a light pastry cream fold in a little softly whipped cream with a flat spatula, just before using.

Posted in Eggs, Sweet Treats | Tagged , , , , , , , | 5 Comments

Eat, Fast and Live Longer. A 5-2 Fast Diet Recipe Idea Under 200 Calories. Chickpea, Tuna and Fennel Salad.

Chickpea, Tuna and Fennel Salad

Tins of tuna and chickpeas have pretty much always been essential standby pantry items in my kitchen. They come in handy and are so very versatile when the cupboard is almost bare and I need to pull together a meal in a hurry. Which is exactly what happened on my last 5-2 fast day.

Originally I had planned to make Baked Eggs Wrapped In Prosciutto  for a late lunch but with my prosciutto having mysteriously disappeared from my fridge I turned to my trusty pantry staples. Paired with shaved fennel, spring onion lemon, parsley and a little chilli they made a deliciously light fast day meal.

Chickpea, Tuna and Fennel Salad
Makes 2 1/2 cups (144 calories per half cup serve)

1 x 400g tin chickpeas, drained weight 240g (394 calories)
1 x 95g tin tuna, drained (153 calories)
1/2 fennel bulb, shaved (36 calories)
1 long green spring onion, finely sliced (5 calories)
1/4 cup flat leaf parsley, shredded (4 calories)
1/2 small red chilli, sliced (4 calories)
juice and finely grated zest of 1/2 lemon (6 calories)
1 tablespoon olive oil (120 calories)
sea salt flakes and freshly ground black pepper, to taste

PLACE drained tuna and chickpeas all into a medium bowl. Toss to combine.
ADD fennel, spring onion, parsley, chilli, olive oil and lemon juice and zest. Toss gently and season to taste with sea salt and freshly ground pepper.

Posted in Salads, Seafood, What I Love to Cook | Tagged , , , , , , , , , , | 1 Comment

Sunday Brunch. Cinnamon Sugared Pop Overs With Apple Compote.

I think I’ve died and gone to heaven. The last thing I wanted to do on a cold, dreary, drizzly winter’s day was leave the cosy confines of our home to make a regular Sunday morning pilgrimage to the bakery.  My easy compromise was to make these.  Cinnamon Sugared Pop Overs, something that has intrigued me and  I have wanted to try for quite a long time now.

These delicate little puffs of air are created from nothing more than a few staple pantry ingredients; milk, butter, sugar, flour and eggs. Mixed together as you would a pancake batter. Poured into heated, greased muffin tins as you would a Yorkshire pudding. Baked in a very hot oven until puffed and golden. Finished with a quick dip in melted butter and rolled in cinnamon sugar. The end result was a cross between a doughnut and a choux pastry bun, but infinitely quicker and easier to make.  The crisp shell encasing a soft fluffy crumb with a completely hollow centre. Utterly delicious and addictive. Perfect for splitting open and dolloping with a sweet fruit compote or smearing with marmalade and jam.

Needless to say these sweet toothed morsels  received an overwhelmingly positive reception,voted as good as the artisan pastries we so often indulge in and easily ousting my family’s previous Sunday brunch favourites Zeppole With Rhubarb Compote or Jam Doughnut Muffins from their hallowed perch. They honestly were that good. In truth my waistline probably won’t be thanking me as we edge closer to Spring. I wish I had a little more self control but I’ll worry about that later.

Cinnamon Sugared Pop Overs With Apple Compote
Makes 10

Pop Overs are traditionally baked in deep steep sided specialty pop over pans, but worked beautifully in my regular muffin tin. This recipe combines the principles I use for baking Yorkshire Puddings (something with which I am familiar) with what is essentially a sweet pancake batter. It worked first time and I was incredibly impressed with the height and airiness of my pop overs. 

3 large eggs, at room temperature
1 1/2 cups whole milk, warmed until just tepid (blood temperature)
2 tablespoons butter, melted
1 teaspoon vanilla
1 1/2 cups flour
1 teaspoon salt
1 tablespoon sugar
a little unsalted butter, softened, for greasing the muffin tin

For the Cinnamon Sugar
2/3 cup sugar
1 teaspoon ground cinnamon
3 tablespoons butter, melted

PREHEAT oven to 225 C. Place a  nonstick muffin tin in the oven to heat through.
COMBINE eggs and milk in a large bowl. Whisk together with vanilla until very frothy.
SIFT together flour, salt and  sugar. Make a well in the centre of the bowl.
ADD a little of the egg mixture. Using a wooden spoon, stir from the centre gradually drawing in the flour from the sides of the bowl.
GRADUALLY add the remaining egg mixture. Beat well until the batter is smooth and the consistency of heavy cream.
STIR in the melted butter.
REMOVE hot muffin tin from oven and generously grease the 10 outer edge cups of the muffin tin. Good circulation gives the popovers a light and airy rise, leaving the centre cups unfilled helps to achieve a better puff.
DIVIDE the batter evenly amongst the prepared muffin cups.
BAKE in very hot pre-heated oven for 15 minutes, then reduce oven temperature to 170 C.
CONTINUE to bake for another 15 minutes until golden brown and dry to the touch.
REMOVE from oven, wait a few minutes until cool enough to handle, then remove the pop overs to a wire rack. Using a small sharp knife pierce a small hole in the bottom of each popover to allow the steam to escape.
COMBINE the sugar and cinnamon in a small bowl. Lightly brush each puff with melted butter, then roll in sugar and cinnamon mixture to coat completely. Serve with apple compote which has been prepared while the pop overs have been baking.

Apple Compote

4 large granny smith apples, peeled, cored and quartered
2 tablespoons water
long strip of lemon rind
3 tablespoons sugar
juice of 1 lemon

SLICE the apples into even sized chunks and place in a heavy based saucepan with the long strip of lemon and water.
COVER the saucepan and cook the apples over over medium heat until the mixture is bubbling. Reduce heat to low and cook, stirring occasionally,  until the apple slices are just beginning to soften.
STIR in sugar and lemon juice. Cover and simmer for a further 5 or so minutes until the apple breaks down but still has some texture. Taste the mixture, adding more sugar if required.
REMOVE from heat. Discard the strip of lemon rind. Allow to cool a little before serving.

Posted in Baked, Fruit, Small Bites, Sweet Treats, What I Love to Cook | Tagged , , , , , , , , | Comments Off on Sunday Brunch. Cinnamon Sugared Pop Overs With Apple Compote.

Another Winter Warmer. Sticky Soy And Honey Roasted Pork Belly with Crisp Crackle.

Slow roasted pork belly has always been a favourite in our home. Meltingly tender with a crisp crackle crust. In summer we enjoy our pork belly with a refreshing vinaigrette based coleslaw. In Winter, however, we turn to a richer Asian inspired variation.

The secrets to foolproof crackle were the subject of one of my earliest and most popular posts It’s All About The Crackling – Slow Roasted Pork Belly Scented with Fennel, and they are just as relevant here. In fact, they have been incorporated into the seemingly long-winded recipe. It’s not as complicated as it might appear at first glance.

Great crackle starts with a scored and thoroughly dried rind. Marinades can be liberally applied to the flesh of the pork belly but be careful (as far as is reasonably possible) to avoid the skin. Once the belly has been slow roasted to perfection, its just a matter of turning up the oven temperature to crisp up the rind into golden, airy perfection. Watch it like a hawk, the honey in the marinade means your belly is more inclined to burn. The braver and more vigilant amongst us might care to crisp up our crackle in mere seconds under a searing hot grill.

The beauty of this dish? It’s another slow cooked winter warmer requiring just a little initial preparation, then it’s simply a matter of set and forget as delicious aromas waft through the house. Carved into thick generous slices and served with wilted Asian greens, a little steamed jasmine rice and a wonderfully sticky soy and honey sauce. The overwhelming verdict? Deliciously rich, decidedly unctuous and enormously satisfying.

Sticky Soy And Honey Roasted Pork  Belly with Crisp Crackle.
Serves 6

1 x 1.5 kg pork belly
1 tablespoon peanut oil
1 teaspoon sea salt

For the Marinade
1/3 cup soy sauce
3 tablespoons honey
1 tablespoon freshly grated ginger
1 tablespoon finely grated zest of a mandarin or orange
2 whole cloves garlic, peeled
2 red birds eye chillies, sliced on the diagonal
2 star anise
1 cinnamon stick
1 tablespoon coriander seeds, toasted
stalks and roots of 1/2 small bunch coriander, leaves picked and reserved for garnish
2 1/2 cups warm water

PREHEAT oven to 160 C. Line a roasting pan that is just a little larger than your piece pork belly with non stick baking paper for easier clean up. I used a 20cm x 20 cm pan.
USING  a sharp knife, score the pork belly skin and fat without cutting into the meat. If time is on your side pour a whole kettle of boiling water over the pork belly, skin side up and dry well with paper towels. I like to do this on a rack in the kitchen sink. Leave to air dry for at least half an hour.
RUB pork skin with a little peanut oil and sea salt.
COMBINE all the marinade ingredients in a bowl. Pour two cups of the marinade into the prepared roasting pan.
PLACE pork belly skin side up in the centre of the pan, the marinade should come no more than three quarters up the sides of the pork belly and its skin surface should remain dry to ensure a crisp crackle. The marinade will evaporate and reduce into a sticky sauce as the pork belly roasts.
ROAST in preheated oven for 2 1/2 to 3 hours until tender. Check every now and then adding leftover marinade or extra water to the pan to prevent the sauce from drying out and caramelising.
WHEN  pork belly is meltingly soft and tender remove the pan from the oven.
INCREASE oven temperature to 250 C. Return the pork belly to the oven on a tray skin side up to crisp up the crackle. Watch carefully as the sugar content of the honey in the marinade means the pork may burn easily. Alternatively you can also crisp up the crackle under a hot grill. When crisp immediately remove from the oven and set aside to rest for 15 minutes.
MEANWHILE strain the sauce through a kitchen towel lined sieve into a bowl ( I find the paper towel will absorb the majority of the fat). Leave to sit and remove any residual fat that has accumulated on the surface.
CARVE the pork in generous slices and serve with wilted Asian greens, a little of the sauce and a side serving of steamed rice.

Posted in Pork, What I Love to Cook | Tagged , , , , , , , | 2 Comments

Ooh La La. Gigot De Sept Heures. Slow Cooked Seven Hour Leg Of Lamb With Haricot Bean Puree.

Slow Cooked Seven Hour Lamb

This week we celebrated a mid winter  Bastille Day with a meltingly tender slow cooked seven hour leg of lamb, Gigot de Sept Heures. An easy set and forget dish that filled the house with an incredible aroma all day long.

Juicy, succulent and full of flavour, after seven hours in a slow oven the meat literally fell off the bone. Served the traditional way a la cuillère  on a bed of bean puree and doused with a rich onion sauce. A classic French bistro recipe which also happens to be exact opposite of how we usually enjoy our lamb; blushing pink and slightly under done. Enormously satisfying it was perfect comfort food for an otherwise chilly and dreary day. Ooh la la we certainly enjoyed this meal.

Just in case you are wondering ‘a la  cuillère’ literally translates as ‘by the spoonful’. True to form we ate our lamb with a spoon, no knife and fork required.

Sllow Cooked Seven Hour Lamb With Cannellini Bean Mash

Slow Roasted Seven-Hour Leg of Lamb With Haricot Bean Puree

Serves 6–8

For The Lamb

2 – 2.5 kg shank end leg of lamb
2 tablespoons extra-virgin olive oil
4 onions , sliced
8 garlic cloves , peeled and sliced
2 – 3 large sprigs fresh  rosemary
2 -3  fresh or dried bay leaves
½ bottle (375 ml) dry white wine
2 cups (500ml) veal or chicken stock
sea  salt flakes and freshly ground black pepper, to taste

For The Haricot Bean Puree

2 cups dried haricot or cannellini beans
1 teaspoon bicarbonate of soda
3 whole cloves garlic
bouquet garni; 3 sprigs fresh thyme and parsley and a bay leaf bundled together with twine
6 whole cloves
1 small brown onion
sea salt flakes and freshly ground black pepper, to taste
2 tablespoons  extra-virgin olive oil
3 tablespoons Greek yoghurt

The Night Before

SOAK the beans overnight in 6 cups of cold water and a teaspoon of bicarbonate of soda.

Seven Hours Before Serving Time

PREHEAT oven to 120 C.
SEASON leg of lamb with sea salt and pepper.
PLACE a heavy, lidded Le Creuset style pot on the stove; add olive oil and thoroughly brown lamb on all sides for 10 – 15 minutes on high until deeply golden.  Transfer lamb to a plate. Drain away all but 2 tablespoons of fat from the pot.
ADD sliced onions and garlic to the pot with a generous pinch of salt. Cook, stirring occasionally, for 10 minutes until soft and translucent.
ADD wine and stock, stir well to combine, scraping up any browned bits from bottom of pot.
BRING to a strong simmer, return the lamb to the pot with the rosemary and bay leaves.
COVER with tight fitting lid and bake in slow pre-heated oven for 6 hours until very tender, turning every 2 hours.
UNCOVER the pot for the last hour of slow roasting to allow the sauce to thicken a little. Baste the lamb with a large ladleful of sauce  every fifteen minutes or so to keep the meat moist and tender.

One And A Half Hours Before Serving Time

PREPARE the haricot bean puree.  Drain soaked beans and transfer to a large saucepan with 6 cups  of fresh water, garlic and bouquet garni.
STUD the onions with the cloves and add to the pot. Bring to the boil, reduce heat to low, cover, and simmer until beans are tender, about an hour.
REMOVE  from heat. Discard bouquet garni and cloves from the onion. Strain beans and garlic, reserving cooking liquid.
BLEND together cooked beans, onion and garlic  with  ¼ cup cooking liquid, oil and yoghurt until smooth and creamy. Add more cooking water to the puree, a tablespoonful at a time, until  desired consistency is achieved.
KEEP warm until lamb is cooked.

To Serve 

SLICE or tear lamb into chunks . Serve over a bed of bean puree doused with plenty of onion  sauce, French style a la cuillère (with a spoon).

Posted in Lamb, What I Love to Cook | Tagged , , , , , , , , | 7 Comments

Eat, Fast and Live Longer. A 5-2 Fast Diet Recipe Idea Under 400 Calories. Brunch Bruschetta With Soft Poached Egg and Avocado Salsa

It has been quite a while since I posted a fast day breakfast or brunch idea. Usually I prefer to save the majority of my calories for a substantial dinner, but every now and then I vary the routine and indulge in a late brunch. Eggs are a perfect fast day ingredient. High in protein and low in calories, an average sized egg is just 75 calories, they are easy to prepare and keep you feeling fuller for longer. Team with a slice of toast and breakfast is done and dusted for under 150 calories. Add a vibrant avocado salsa and suddenly eggs on toast are transformed into a delicious bruschetta. Allowing you to eat breakfast or brunch  like a king or queen for just 338 calories.

Of course the avocado  salsa can be enjoyed on its own sans egg or toast. At just 195 calories per serve it makes an indulgently delicious but perfectly justifiable treat. Here’s some food for thought. Although relatively high in calories  buttery tasting avocados are actually very good for you. Low in carbohydrates and rich in dietary fibre, they’re full of  mono unsaturated omega 9 fatty acids responsible for lowering cholestrol, promoting heart health and controlling blood sugar, and contain loads of oleic acid that activates that part of your brain that makes you feel full.

Used sensibly avocados work brilliantly in a 5-2 fast day diet. I love that this brunch bruschetta can be broken down into three very separate elements that can be enjoyed together or on their own.

Brunch Bruschetta With Soft Poached Egg  and Avocado Salsa

Serves 1 (338 calories per serve)

1 medium slice sourdough bread, lightly toasted (68 calories)
1 poached egg, recipe here (75 calories)
1/2 cup avocado salsa (195 calories)

SPOON  avocado salsa evenly over slice of toast.
TOP with poached egg and serve immediately.

Avocado Salsa
Makes 3 cups  (195 calories  per 1/2 cup serve)

2 ripe Hass avocados, stones removed and diced (500 calories)
1 punnet (250g) cherry tomatoes (54 calories)
3 long green spring onions (scallions), finely sliced (15 calories)
1/4 cup coriander leaves, coarsely shredded (4 calories)
juice and finely grated zest of 1 lime (12 calories)
a dash Tabasco sauce (1 calorie)
sea salt flakes and freshly ground black pepper, to taste

PLACE all the ingredients in a bowl and stir very gently to combine.

Posted in Breakfast, Eggs, What I Love to Cook | Tagged , , , , , , , , , , | 7 Comments

Not Too Naughty But Very, Very Nice. Sweet And Salty Popcorn.

Sweet And Salty Popcorn

We’ve been air popping corn in brown paper bags these school holidays. In the microwave. Sprinkled with a little sea salt. A simple,no fuss, easy to prepare but  deliciously healthy snack. Of course my teenagers’ overwhelming preference is for a Lolly Gobble Bliss Bomb style of  rich buttery caramel corn laden with nuts (recipe here). Utterly addictive, falling squarely in the ‘naughty but nice’ corner. Far more labour intensive involving a microwave, stove top and oven.

Me? I like to take the middle road. Crisp toffee laced popcorn. A little sweet. A little salty. Using just three ingredients; popcorn, sugar and salt, and two appliances; a microwave to pop the corn and a heavy based saucepan to dry caramelise the sugar and salt to golden perfection.

Fast and efficient, this process requires just a little hawk-eyed vigilance. Add a thin even layer of white table sugar to a heavy based saucepan, sprinkle over a little salt and heat over a medium flame. I find it easiest to caramelise no more than 1/3 cup of sugar at a time. After a few moments the  sugar will begin to melt, then colour. Swirl the pan every now and then to caramelise the sugar at an even rate. Avoid stirring as this may encourage the sugar to recrystallise. Remove the pan from the heat as soon as the toffee is  golden and immediately add the popped corn. Stir well to coat evenly. The reward? Deliciously sweet and salty crisp shell toffee covered popcorn. Not too naughty but very, very nice.

Sweet and Salty Popcorn

3-4 cups of popped corn (see below)
1/3 cup sugar
1/2 teaspoon sea salt flakes

PLACE a large heavy based non stick pan or wok over medium heat.
ADD the sugar in an even layer. Sprinkle over salt.
HEAT without stirring  until the mixture caramelises, swirling the pan every now and then until all the sugar crystals have dissolved and the mixture is a light golden colour. Remove the pan from heat.
CAREFULLY tip popped corn kernels into the pan. Use a spatula to combine, ensuring all kernels are lightly cool.
ALLOW to cool before breaking into chunks and storing in an airtight container or glass jar.

Microwaved Popcorn Using a Brown Paper Bag
Makes 3-4 cups

1/4 cup popcorn kernels
1/4 teaspoon olive oil
1 brown paper lunch bag

IN A CUP mix together the popcorn kernels and oil.
POUR  coated corn into a brown paper lunch bag. Fold the top of  bag over twice to seal in the kernels.
PLACE the bag in the microwave, ensuring the bag stands upright on the carousel.Leaning the bag against an empty cup helps keep the bag upright as it cooks and prevent the popcorn from burning.
COOK on medium power for 2 – 2 1/2 minutes, or until you hear pauses of about 2 seconds between pops. Remove from oven.
CAREFULLY open the bag to avoid escaping steam.
POUR popcorn into a bowl, and discard any unpopped kernels of corn.

Posted in Sweet Treats, What I Love to Cook | Tagged , , , , , | 2 Comments

An Intense Citrus Flavour Burst. Dry Roasted And Ground Mandarin Peel. Sweet Or Spicy.

Mid winter coincides with peak citrus season. Suddenly my fruit bowl has transformed into an overflowing still life study of  vibrantly hued, sweetly scented lemons, oranges and mandarins.  Summer’s limes have given way to cooler climate lemons, and lately I’ve taken to substituting mandarins for oranges in both my sweet and savoury cooking.

Highly prized in China, plump, round mandarins with their golden glow have long been considered to be auspicious symbols of good fortune and abundance. Once upon a time  they were strictly reserved for royalty, and were  named after the deep orange robes  traditionally worn by mandarins; high ranking Chinese officials of the Imperial Court. Fittingly, mandarins also pair beautifully with classic Chinese flavours. Think of rich and luxurious soy braised duck paired with mandarin and five spice; star anise, cinnamon, cloves, Szechuan peppercorns and fennel.

Bright and juicy,they’re sweeter and less acidic than their more conventional cousins, imparting a gentler, more reserved citrus tang. With a thinner pith the delicate peel is also much  less bitter, providing a perfect winter seasoning; effortlessly peeled into long spiral strips, freshly zested, or as I recently discovered, dry roasted and  finely ground into a powder.

The process couldn’t be easier. Simply  place very  finely sliced whole mandarins in a slow oven to dry roast until shatteringly crisp . You will be rewarded with gorgeously burnished but delicate slivers of intensely flavoured mandarin. Choose organic fruit if possible, and remember to scrub well  and dry thoroughly before slicing with a very sharp knife. I abandoned my mandolin in this instance as I found the very juicy fruit tended to disintegrate into a sodden mess. ‘When roasted use a spice grinder to pulverise  into a fine, intensely flavoured citrus powder.

Sweet or spicy? You choose. Here are two variations to get you started.  A Sweet Mandarin Infused Sugar or Spiced Mandarin Salt. Ready to impart an intense citrus flavour burst and brighten up a dreary winter’s day.

Sweet Mandarin Infused Sugar

1 medium sized mandarin, washed, dried and thinly sliced
1/2 cup sugar

PREHEAT oven to 120 C.
ARRANGE thinly sliced mandarins in a single layer on a large baking paper lined oven tray.
DRY ROAST  for  2 hours until dry and brittle.
PLACE into the bowl of a spice grinder or small food processor with sugar and grind until fine.
STORE in a jar for up to a month. Sprinkle over fruit compote, stir into porridge or rice puddings, infuse into custard or cream, add to sweet batter or dough for an intense citrus flavour burst.

Spiced Mandarin Salt

1 medium sized seedless mandarin, washed, dried and thinly sliced
4 heaped tablespoons flaky sea salt
1 teaspoon Chinese five spice powder

PREHEAT oven to 120C.
ARRANGE thinly sliced mandarins in a single layer on a large baking paper lined oven tray.
DRY ROAST  for  2 hours until dry and brittle.
PLACE into the bowl of a spice grinder or small food processor with sea salt and Chinese five spice powder and grind until fine.
STORE in a jar for up to a month. Add to marinades and dressings, spice rubs, stews and slow cooked dishes, and roasted meats and  vegetables for an intense citrus flavour burst.


Posted in Fruit, Marinades, Pastes and Dressings, What I Love to Cook | Tagged , , , , , , , , | 3 Comments

Eat, Fast and Live Longer. A 5-2 Fast Diet Recipe Idea Under 300 Calories. Seared Snapper Fillet With A Fresh Parsley And Chive Sauce.

Seared Snapper With A Fresh Parsley And Chive Sauce.

Here is a very simple idea for a fast day feast. A perfectly seared snapper fillet paired with a vibrant fresh parsley and chive sauce. Ready in mere minutes. Prepare the sauce in advance and store in the refrigerator, or pulse in a small food processor as you sear the snapper to golden perfection. Serve with a lightly dressed salad. Today it’s crisp seasonal winter radicchio and fennel. All in all a delicious plate of food that’s low in calories and very, very good for you.

Snapper Fillets With Fresh Parsley And Chive Sauce

Seared Snapper Fillets
Serves 4 (210 Calories Per Fillet Serve) (Add 19 Calories Per Tablespoon Fresh Parsley And Chive Sauce)

4 x 180g snapper fillets, skin on, pin boned (720 calories)
1 tablespoon olive oil (120 calories)
a generous pinch of sea salt and good grinding of pepper

HEAT a heavy based fry pan over medium-high heat. Add olive oil.
SLASH skin at 1.5 cm intervals to allow heat to penetrate and prevent skin from curling. Pat dry.
SEASON  flesh-side of snapper with salt and pepper. When the oil is hot, add to pan skin-side down.
SEAR until the skin is golden brown and crispy, about 5 minutes.
TURN over and cook  flesh side for 1 to 2 minutes more,depending on the thickness of the fillet.
TO serve, place seared fillet on a plate and top with a generous dollop of fresh parsley and chive sauce (recipe follows) and a side salad.

Fresh Parsley And Chive Sauce

Fresh Parsley And Chive Sauce
Makes 1 cup or 16 tablespoons (19 calories per tablespoon)

1 ½ cups fresh flat-leaf parsley leaves, picked from the stem (33 calories)
1 long green spring onion, coarsely chopped (8 calories)
¼ cup fresh chives, coarsely chopped (4 calories)
2 tablespoons extra-virgin olive oil (240 calories)
2 teaspoons Dijon mustard (10 calories)
juice and finely grated zest of half a small lemon (6 calories)
a generous pinch of sea salt and good grinding of pepper

PLACE the parsley, spring onion chives, olive oil, mustard lemon zest and juice into the small bowl of a food processor with a tablespoon of water.
PULSE until smooth. Season to taste with sea salt and freshly ground pepper.
SPOON into a small bowl, cover with cling wrap and store in the refrigerator until ready to serve.

Posted in Marinades, Pastes and Dressings, Seafood, What I Love to Cook | Tagged , , , , , , , , | Comments Off on Eat, Fast and Live Longer. A 5-2 Fast Diet Recipe Idea Under 300 Calories. Seared Snapper Fillet With A Fresh Parsley And Chive Sauce.

Inspired By Wimbledon. Individual Strawberry Shortcakes With Creme Fraiche


Individual Shortcakes With Creme Fraiche

I have a confession to make. I’m obsessed with Wimbledon. The oldest and most prestigious tennis tournament in the world. Hosted each year by the All England Lawn Tennis Club. So deep is my obsession that  I have just spent the better part of the past two weeks bleary eyed  and sleep deprived watching live coverage of all the tennis action through the early hours of the morning. No mean feat considering that here on the other side of the world that coverage doesn’t commence until 11 pm and with rain delays can extend to the breaking dawn of a brand new day.

Here in the Southern Hemisphere we  might be shivering through the depths of winter, but over in merry England it’s high summer. Not surprisingly the tournament is also synonymous with strawberries and cream. If  popular legend is to be believed this delectable pairing was  first introduced to court side crowds by King George V in the early 1900’s. Today the eating of strawberries and cream at Wimbledon has become a quaint but charming tradition. So much so last year alone crowds consumed  a mind boggling 28,o00 kilos of strawberries along with 7,000 litres of cream.

How fortuitous, therefore, that this week a bumper crop of  luscious strawberries from sunny Far North Queensland have flooded the markets. Inspired by Wimbledon, here is my take on strawberries and cream. Individual Strawberry Shortcakes With Creme Fraiche. Melt in your mouth delicious; the strategy is simple. Bake ahead and store the shortcakes in an airtight container. They are then ready to be easily assembled. At a moment’s inclination. Day or night.

Individual Strawberry Shortcakes With Creme Fraiche
Makes 10 Shortcakes

1 block (250g) unsalted butter
3 tablespoons caster sugar
1 teaspoon pure vanilla extract
1 carton (300 ml) pouring cream
2 2/3 cups (400g) plain flour
1 1/2 teaspoons baking powder

2 punnets (500g) strawberries, hulled and sliced, to serve
1 cup creme fraiche, to serve
2 tablespoons icing sugar, sifted, for dusting

PREHEAT oven to 180 C. Line two oven trays with baking paper.
SIFT together flour, sugar and baking powder into a large bowl.
USE fingertips to rub butter into the mixture until it resembles coarse breadcrumbs.
COMBINE cream and vanilla extract in a jug. Slowly add to the butter and flour mixture. Using a flat-bladed knife mix until the dough just begins to come together.
TURN dough onto a lightly floured surface and knead gently until smooth and elastic.
ROLL out dough with the palm of your hand or with a rolling pin to 1cm – 1.25cm thickness.
USING an 8 cm (diameter) round cutter, stamp out 10 shortcakes.
PLACE the shortcakes, spaced at least 3cm apart, on the prepared oven trays.
BAKE in preheated oven for 20 – 25 minutes until risen and lightly golden. Remove from oven and allow to cool. Store in an airtight container until required.
TO SERVE, spread a generous dollop of creme fraiche over each shortcake, top with sliced strawberries and a dusting of icing sugar.

Posted in Baked, Sweet Treats, What I Love to Cook | Tagged , , , , , , , | 13 Comments