I have a penchant for artisan bread. Honed from a very young age. Round, rustic loaves with a thick, crisp crust and a moist chewy crumb. From time to time I lazily anticipate making my own bread at home. Spurred on by the romanticism of the idea and the imagined heady aroma of freshly baked bread wafting through the house. Until the reality of the time consuming process sets in – all that kneading, pummelling and proving of the dough. Time poor I relent and revert to beating a well worn path to my local bakery for my daily bread. I vaguely remember the No-Knead bread phenomena which swept the globe when Mark Bittman posted Jim Lahey’s recipe for No Knead Bread in the New York Times in 2006. Just four ingredients; flour, water, yeast and salt. And more importantly no kneading. Five minutes of preparation. A quick stir and 18 hours of proving in a bowl. Leaving Mother Nature to work her magic.
My interest may have been more than a little piqued at the time, but in the hurly burly of everyday life that recipe was forgotten. Until this week when browsing the blogosphere But I’m Hungry’s post, No Knead Bread, caught my eye. The images of Christina’s perfectly formed loaves had me drooling. I couldn’t quite believe that No Knead Bread could look so wonderful. On closer examination she had even used Jim Lahey’s original recipe. A no brainer really, I just had to give this a try. And now I’m hooked. As my first perfect loaf of bread came out of the oven I prepared another batch of dough in readiness for the next morning. Many thanks to Christina at But I’m Hungry for the inspiration. Check out her blog post here. You really must try this. At least once. The recipe is pure genius producing crusty artisan bread that rivals that of my neighbourhood bakery. And that is really saying something.


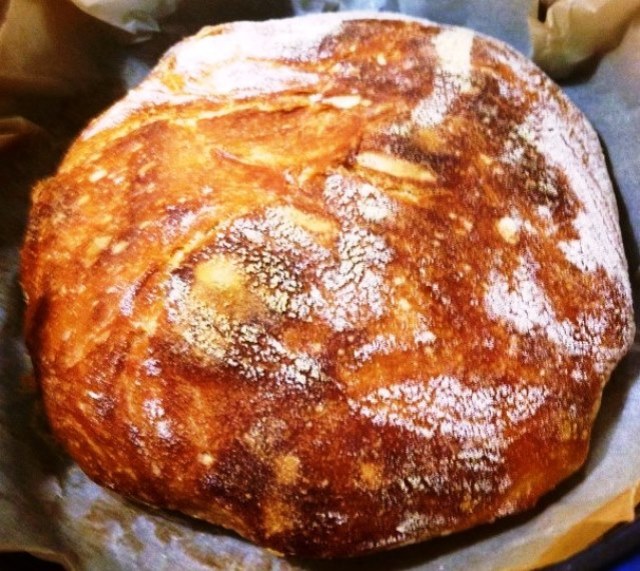
Crusty No Knead Artisan Bread
Adapted from Jim Lahey, Sullivan Street Bakery
3 cups all-purpose or bread flour, more for dusting
¼ teaspoon instant yeast
1¼ teaspoons salt
flour, cornmeal or semolina for dusting
IN A LARGE bowl combine flour, yeast and salt. Add 1 5/8 cups water, and stir until blended; dough will be shaggy and sticky.
COVER bowl with plastic wrap. Let dough rest at least 12 hours, preferably about 18, at room temperature.
DOUGH is ready when its surface is dotted with bubbles. Lightly flour a work surface and place dough on it; sprinkle it with a little more flour and fold it over on itself once or twice. Cover loosely with plastic wrap and let rest about 15 minutes.
USING just enough flour to keep dough from sticking to the work surface or to your fingers, gently and quickly shape dough into a ball. Generously coat a cotton towel (not terry cloth) with flour, semolina or cornmeal; put dough seam side down on towel and dust with more flour, bran or cornmeal.
COVER with another cotton towel and let rise for about 2 hours. When it is ready, dough will be more than double in size and will not readily spring back when poked with a finger.
AT LEAST a half-hour before dough is ready, heat oven to 225 C. Place a heavy covered pot (cast iron, enamel, Pyrex or ceramic) in the oven as it heats. When dough is ready, carefully remove pot from oven.
SLIDE your hand under towel and turn dough over into pot, seam side up; it may look like a mess, but that is O.K. Shake pan once or twice if dough is unevenly distributed; it will straighten out as it bakes.
COVER with lid and bake 30 minutes, then remove lid and bake another 15 to 30 minutes, until loaf is beautifully browned. Cool on a rack.