Waste Not. Want Not. From An Italian Mama’s Kitchen. Pasta With Broccoli, Pancetta, Chilli And Garlic.

Broccoli Pasta With Pancetta, Garlic and Chilli

With three teenagers I always seem to be in the car. Driving them to one or another of their sport or extracurricular commitments. More often than not I’m stuck in traffic. Listening to the radio. The other day I happened to eavesdrop on a talk back segment about broccoli. Or more specifically a rather animated and illuminating  conversation about whether broccoli should be sold by weight after the stalks  have been removed. The consensus seemed to be that as no-one actually eats the stalks, growers should perhaps remove them before bringing the broccoli to market. I was stunned. Obviously these listeners hadn’t grown up in an Italian mama’s kitchen where the maxim “waste not, want not” was the mantra of the day.

We’ve always eaten broccoli stalks in our house. They have all the flavour and nutrition of the florets and are often sweeter. In fact one of my family’s most loved pasta dishes is a classic southern Italian dish that utilises the whole head of broccoli. Stalk and all. The florets are separated from their stems and cooked until soft in the same water as the pasta. The stalks are trimmed and diced and gently sautéed garlic, chilli and anchovies in butter and olive oil. The two components are combined at the last moment. Absolutely delicious served with a generous grating of parmesan or pecorino cheese.

Pasta With Broccoli, Pancetta, Chilli And Garlic
Serves 4.

500g dried pasta, I like to use  orrechiette, casarecce or penne
2 small heads of broccoli
50 ml extra virgin olive oil
50g butter
80g pancetta or bacon. finely diced
5 anchovy fillets (optional)
3 cloves garlic, finely chopped
2 long red chillies, finely chopped
sea salt and pepper
grated parmesan or pecorino to serve

PREPARE the broccoli by removing the florets and breaking them into small bite size pieces. Trim and discard any larger woody part of the stalks. Slice the remaining tender stalks into a small dice.
HEAT a tablespoon  olive oil in a large non stick pan over medium heat. Add the pancetta and fry until crispy.
REDUCE heat to low and add the remaining oil and butter.  When the butter has melted add the garlic, chili and anchovies, sauté for 3 minutes being very careful not to burn the garlic, then add the broccoli stalks. Stir gently to combine.
COVER the pan and cook on a very low heat another 10-15 minutes until the stalks are very soft. Take pan off the heat.  Season to taste.
MEANWHILE bring a large pot of salted water to the oil. Cook the pasta according to the instructions on the packet. When the pasta is half-cooked add the broccoli florets. Continue to cook the pasta for the recommended cooking time.
DRAIN the pasta and broccoli, reserving half a cup of the cooking water.
ADD pasta and broccoli to the sauce. Stir well to coat adding a little of the pasta cooking water to make a creamy sauce.
SERVE immediately with a good grating of parmesan or pecorino cheese.

Posted in Pasta, Vegetables, What I Love to Cook | Tagged , , , , , , , | 2 Comments

Mid Week Dessert. Quick and Easy. Hot Apple Wonton Pies.

Hot Apple Wonton Pies

Tuesday night in our house is all about using up the contents of the fridge before our weekly grocery shop. This week’s inventory included half a packet of wonton wrappers left over from our weekend ricotta ravioli fix. Perfect for a quick and easy mid week dessert. Mini hot apple pies. Made with wonton wrappers. Baked in the oven. These disappeared in a flash. Crisp and crunchy on the outside. Oozing with sweet, cinnamon spiced apple on the inside. An instant hit. So much so I think  I’ll be visiting my Asian grocer for more wrappers this week.

Hot Apple Wonton Pies In Progress

Hot Apple Wonton Pies

Makes 15 Pies

2 medium granny smith apples or similar, peeled, cored, and chopped into a fine dice
1 heaped tablespoon demerara or raw sugar
1 heaped tablespoon almond meal
1 teaspoon  fresh lemon juice
1/2 teaspoon ground cinnamon
30 wonton wrappers, egg pastry variety best
20g butter, melted
additional demerara sugar for sprinkling
a little icing sugar for dusting

PREHEAT oven to 180 C.  Line a large oven tray with with baking paper
IN A SMALL  bowl, combine apples, almond meal, sugar, lemon juice, and cinnamon; toss to coat apples.
PLACE half the wonton wrappers on a flat work surface. Drop a heaped teaspoon of the apple mixture into the middle of each wrapper.
USING  a pastry brush moisten the edges of each wonton wrapper with a little water. Top with remaining wrappers.
PRESS down firmly to seal the edges around the filling,
USE a  7.5 cm round cutter or glass tumbler to cut out the apple pies. Discard the trimmings and transfer the completed pies to the prepared baking tray.
BRUSH the tops of the pies with melted butter and sprinkle liberally with demerara sugar.
BAKE in a hot oven for 15 minutes until crisp.
SERVE immediately dusted with a little icing sugar.

Posted in Baked, Fruit, Sweet Treats, What I Love to Cook | Tagged , , , , , , , , | 6 Comments

The 5-2 Challenge. My Fast Day Snack With Crunch. Oven Baked Beetroot Crisps.

Oven Baked Beetroot Crisps

Sweet, earthy beetroot. Perfect fast day food. High in fibre and antioxidants. Low in calories and fat with an  impressive energy count of only 45 calories per 100 grams. A cooler weather vegetable, beetroot also happens to be in abundant supply at this time year. What to make with the four crimson orbs languishing in my crisper?  Today it’s something new. Oven Baked Beetroot Crisps. Finely sliced on a mandolin, lightly drizzled with a little olive oil and baked in a very hot oven until  crisp and crunchy.

Originally I had planned to use my beetroot crisps in a winter salad. That was before they emerged from the oven. Crunchy and inviting. It didn’t take long for the surreptitious taste testing to begin. These truly are delicious. And incredibly moreish. In the end it was much, much easier to place a bowl of beetroot crisps on the kitchen counter for my family to enjoy. My fast day snack with crunch. At only 67 calories per serve, this indulgence is marginally lower in calories than my not so occasional fast day skim milk cappuccino hit.

Breakfast
1 Cup Tea
2
Lunch
Boiled Egg and One Slice Toast
140
Mid Afternoon
1 Serve Oven Baked Beetroot Crisps
67
Dinner
2 Serves Stracciatella Soup
270
 
1 Cup Tea With 1 Teaspoon Sugar
18
Total Calories
 
497

Oven Baked Beetroot Crisps

Serves 4 (67 calories per serve)

4 medium sized (350g) beetroot (148 calories)
1 tablespoon olive oil (120 calories)
sea salt flakes to season

PREHEAT oven to 180 C. Line three large oven trays  with baking paper.
DRIZZLE olive oil into a large shallow bowl. Add 2-3 generous pinches of sea salt. Stir to combine.
WASH and peel beetroot. Slice finely using a mandolin or very sharp knife. The thinner the better.
PLACE the sliced beetroot into the oiled bowl. Mix well to ensure each slice is coated with a little oil.
LAY the beetroot slices in a single layer on the oven trays.
BAKE for 20 – 30 minutes. Halfway through baking  turn the slices over and rotate the oven position of the trays. The beetroot will begin to crisp from the outside in. Baking time will vary depending on your oven and how thinly the beetroot has been sliced. Check the beetroot often towards the end of their baking time to make sure they are not beginning to burn.
TURN off the oven when baked and leave trays in the oven to allow the beetroot slices to continue to crisp up in the warm oven for at least another 30 minutes.

Posted in To Serve with Drinks, Vegetables, What I Love to Cook | Tagged , , , , , , , | 19 Comments

Pasta Making At Home. An Easy Cheat. Wonton Wrapper Ravioli Filled With Ricotta.

Ricotta Ravioli Cutting

Ricotta ravioli are always are very special treat at our house. Soft pillows of lemon scented ricotta and parmesan cheese encased in silky smooth pasta. Traditionally made from scratch with long sheets of homemade pasta they can be time consuming to make. These days with a very busy  schedule I rarely dust off my rather neglected pasta machine. Instead I turn to a very easy but clever cheat. Wonton wrappers sourced from the chilled goods section of my very obliging Asian grocer. So very easy. All I have to do is make the filling and recruit my greedy troops to assist with the stuffing. How easy is that?

It is important to use wonton wrappers that contain egg. These most closely resemble egg pasta used to make ravioli. They are sold at my grocer in packages marked egg pastry. At $2.50 for a packet of 60 wrappers they are incredibly economical to use. The pastry is thin and delicate and produces very light and silky ravioli. Here is how it’s done.


Wonton Wrapper Ravioli Filled With Ricotta

I like to serve these with a bolognese sauce. Recipe here.

Makes 60 ravioli,  sufficient for 6-8 generous serves

2 x 250g packets of egg pastry wonton wrappers (60 wrappers per packet)
750g fresh ricotta, drained
1 cup freshly grated Parmigiano-Reggiano, plus more for serving
1 large egg
a generous pinch of freshly grated nutmeg
freshly grated lemon zest of 1 lemon
sea salt flakes and freshly ground black pepper

IN A LARGE bowl combine the ricotta, nutmeg, lemon zest, Parmigiano-Reggiano, and egg. Season to taste with salt and pepper, stir well, and set aside.
LINE two oven trays with baking paper. Set aside.

Working in batches until all wonton wrappers have been used:
PLACE five square wonton wrappers onto a clean, lightly floured chopping board.
TOP each wrapper with a heaped teaspoon of the ricotta mixture. Be careful not to overfill the ravioli as the mixture will expand as it cooks and cause the ravioli to burst.
USING a pastry brush moisten the edges of each wrapper with a little water. Top each  with a fresh wrapper.
PRESS down firmly to seal the edges around the filling, working from the centre out to the edge to force out air and ensure the filling doesn’t leak as the ravioli cook.
CUT the ravioli into rounds using a  7.5 cm round cutter or glass tumbler.
DISCARD the trimmings and transfer the completed ravioli to the prepared baking tray in a single layer.

WHEN all the ravioli have been made, cover the trays with clingwrap. and refrigerate for a few hours before cooking.
COOK ravioli in three or four batches. Bring a large pot of lightly salted water to the boil. Cook each batch, uncovered, at a gentle boil until the pasta rises to the top and is just tender to the bite. Approximately  3-4 minutes.
REMOVE cooked ravioli from the pot with a slotted spoon and serve with your favourite pasta sauce and freshly grated Parmesan cheese.

Note: Ravioli can be frozen by placing the baking tray directly in the freezer. Transfer the ravioli to a plastic bag when frozen. They can be stored frozen for up to three months. Frozen ravioli will take about 10 minutes to cook. Best not to defrost before use, just place directly into a pot of boiling water.

Posted in Cheese, Pasta, What I Love to Cook | Tagged , , , , , , , , | Comments Off on Pasta Making At Home. An Easy Cheat. Wonton Wrapper Ravioli Filled With Ricotta.

My Asian Pantry Staple. Homemade From Scratch. Sweet Chilli Jam.

Sweet Chilli Jam

Chilli jam. Another of my pantry staples. Incredibly versatile, it can be used anywhere you need a sweet and spicy flavour hit. A key ingredient in one of our favourite meals, Thai Chicken Stir Fry With Sweet Chilli Jam and Cashews. Not surprisingly an opened jar doesn’t last long in our house. Slathered on toasted ham and cheddar cheese sandwiches or onion bagels with cream cheese. Fabulous in burgers, sausage or bacon and egg sandwiches. Thinned with a little vinegar or mirin it does double duty as a dipping sauce. For spring rolls, gyoza and dumplings. It has a natural affinity with anything crisp, crunchy or fried. Think potato wedges with sour cream.

And so it transpired on a cold, wet afternoon not wanting to venture out I stayed home and made sweet chilli jam. From scratch. Using a very simple recipe with just a few ingredients. A quick blitz in the food processor. A slow simmer on the stove. In little over an hour my efforts were rewarded with a gleaming jar of glossy, deliciously sticky, fiery red chilli jam. Try it. It really is much easier than you might think.

Sweet Chilli Jam

6 long fresh red chillies, coarsely chopped
1 red onion, coarsely chopped
2 garlic cloves, coarsely chopped
1/2 cup water
2 cups white sugar
1/3 cup rice wine vinegar
1 lime or lemon, juiced
1 teaspoon fish sauce

PROCESS the chilli, onion, garlic and water in a food processor until finely chopped.
TRANSFER to a medium saucepan. Add the sugar, vinegar, lime or lemon juice and fish sauce.
STIR over medium-low heat until the sugar dissolves.
INCREASE heat to medium-high and bring to the boil. Reduce heat to medium-low and simmer for 45 minutes or until the jam gels when tested. Simply place a teaspoon of jam on a chilled saucer and leave to cool for a few minutes. If it firms up and sets its ready.
SPOON the hot jam into clean, dry jars. Set aside to cool. Seal. Once opened store the jar in the fridge for up to 2 months.

Posted in Marinades, Pastes and Dressings, Vegetarian, What I Love to Cook | Tagged , , , , , , | Comments Off on My Asian Pantry Staple. Homemade From Scratch. Sweet Chilli Jam.

The 5-2 Challenge. Winter Greens. Radicchio and Endive Salad with Fennel, Apple, Crisp Pancetta and Roasted Hazelnuts.

Winter Salad of Radicchio and Endive with Fennel, Apple, Pancetta and Hazelnuts

It’s mid winter and I’m craving salad. Winter greens are far more robust than their more popular summer siblings. Crisp with a crunchy texture and slightly bitter taste  my favourite winter greens have to be baby endive with its delicate, curly, pale green leaves and the sturdier ruby red radicchio treviso.  These leaves really do produce a beautifully crisp salad. Especially when paired with wafer thin slices of aniseed flavoured fennel and sweet green apple. Offset any bitterness with a lemon and mustard vinaigrette. Shards of salty, oven baked prosciutto and  crushed, buttery hazelnuts complete the very pretty picture.

At only 165 calories for a very generous serve, this salad is filling and delicious with lots of interesting flavours and texture. The perfect fast day lunch. Followed up later in the day with a hearty bowl of puy lentil and vegetable soup. Recipe here.

Breakfast
1 Cup Tea
2
Lunch
Winter Salad of Radicchio and Baby Endive
165
Mid Afternoon
1 Skim Cappuccino
70
Dinner
1 Bowl of Puy Lentil and Vegetable Soup
166
1 Cup Tea With 1 Teaspoon Sugar
18
Total Calories
420

Radicchio and Endive Salad with Fennel, Apple, Crisp Pancetta and Roasted Hazelnuts.
Serves 6 (165 calories per serve)

1 medium head radicchio treviso, cored and sliced (75 calories)
1 small head of baby endive (45 calories)
1 medium fennel bulb, thinly sliced,  fronds reserved (73 calories)
1 large crisp Granny Smith apple unpeeled, thinly sliced (110 calories)
100g rolled pancetta, thinly sliced (250 calories)
juice of 1 lemon (2 calories)
1 teaspoon Dijon mustard (4 calories)
1 small shallot, finely minced (7 calories)
2 tablespoons extra virgin olive oil (240 calories)
3 tablespoons hazelnuts, roasted, peeled and coarsely chopped (180 calories)
sea salt flakes and freshly ground pepper

PREHEAT oven to 180 C. Line an oven tray with baking paper.
PLACE pancetta on the oven tray and roast in a hot oven until crisp, about 10 minutes. Remove from oven. Cool and break into shards. Set aside.
COMBINE the radicchio, endive, fennel and apple in a large bowl.
IN ANOTHER bowl, whisk together the lemon juice, mustard, shallot, salt and pepper. Gradually whisk in the olive oil.
DRIZZLE dressing over the salad leaves, tossing gently to combine. Season to taste with sea salt flakes and freshly ground pepper.
GARNISH with fennel fronds, hazelnuts and crisp pancetta.

Posted in Salads, What I Love to Cook | Tagged , , , , , , , , , , | 2 Comments

Melt. Mix. No Bake. Chocolate Peanut Butter Cornflake Slice.

Chocolate  Peanut Butter Cornflake Slice

This slice couldn’t be easier. Melt. Mix. Set in the refrigerator. An easy no bake recipe made with pantry staples. Chocolate, peanut butter and cornflakes. Rich, decadent and incredibly moreish. Proof that sometimes the best recipes really are the simplest. This one’s a no brainer. Whipped up at a moment’s notice when I’ve promised my family something sweet and I’m short of time. In  this case my last hurrah before school goes back tomorrow.

Chocolate Peanut Butter Cornflake Slice
From The Australian Womens Weekly Macaroons and Biscuits

125g butter, coarsely chopped
1/2 cup caster sugar
1/3 cup light corn syrup
1/3 cup crunchy peanut butter
4 cups cornflakes
350 gram block of dark chocolate, melted

GREASE a 20cm x 30cm baking tin. Line the base and long sides with baking paper, extending paper 5cm over sides.
STIR butter, caster sugar, corn syrup and peanut butter in large saucepan over low heat until sugar dissolves.
BRING to the boil. Reduce heat, simmer, uncovered, without stirring, 5 minutes.
GENTLY stir in cornflakes.Spread mixture into prepared tin, press firmly. Refrigerate about 30 minutes until set.
SPREAD melted chocolate over slice. Stand at room temperature until set. Cut into 24 squares.

Posted in Chocolate, Sweet Treats, What I Love to Cook | Tagged , , , , , | 4 Comments

The 5-2 Challenge. Cooking From Scratch. Home Made Yoghurt In A Jar.

Home Made Yoghurt

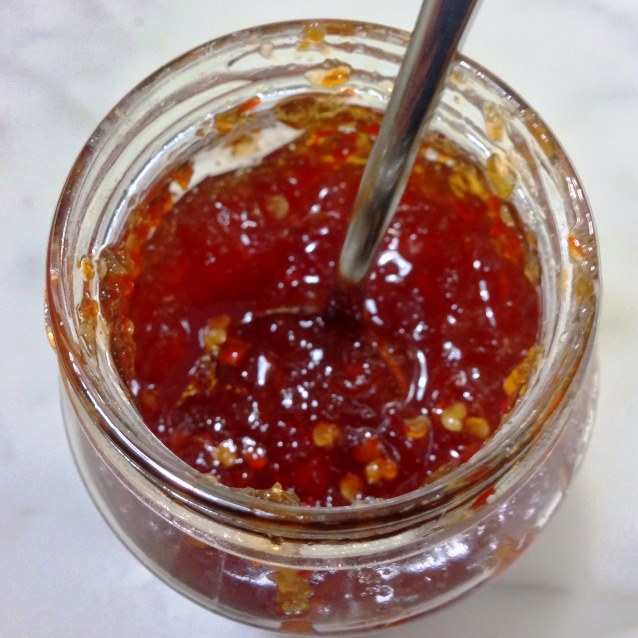
I like to include yoghurt in my menu planning for fasting days. Relatively low in calories, high in protein it keeps me feeling fuller for longer. Most important for keeping the hunger pangs away. All yoghurts are excellent sources of protein, calcium, potassium, zinc and vitamins B6 and B12. But not all created equal. There’s a wide variety of yoghurt available on the market, ranging from plain to flavoured, non fat to full cream. Some all natural. Others full of added sugar, preservatives and artificial colours and  flavourings. A few weeks ago I chanced across an article extolling the virtues of homemade yoghurt. I had never considered making my own yoghurt, preferring to pick up a tub of all natural Greek yoghurt from the supermarket. After my recent successful attempt at making fresh ricotta cheese in my kitchen one  Sunday morning, I thought why not.  Apart from the satisfaction of making it myself, I would have full control of the ingredients used in the making of  it.  So here it is another attempt at cooking from scratch. Homemade Yoghurt in a Jar.

The idea of making your own yoghurt might seem a little complex, but once you get the hang of it, it all becomes pretty simple and straightforward. It really is much easier than you might think.  Heat some milk, let it cool, stir in a starter, pour into a jar and leave wrapped in a tea towel in a warm spot in the kitchen while the cultures work their magic overnight. Whilst yoghurt starters can be bought from specialty health food stores, the easier alternative is to use a bit of leftover yoghurt from a previous batch of homemade yoghurt or from  a tub of commercially prepared yoghurt with live bacteria. Check the label and look for probiotics, most commonly lactobacillus acidophilus. For the record I used  Chris’ All Natural Greek Yoghurt for my inaugural batch. No fancy equipment is required, although a candy thermometer helps gauge the required temperature of the milk as you heat and cool it the first few times you attempt making yoghurt at home.

The  calorie count of a batch of homemade yoghurt is heavily dependent upon the fat content of the milk used. For comparison a quick google of the Dairy Farmer’s website shows the calorie count  per 100ml of its most popular products

  • Original (full cream) milk  64 calories
  • New (2% fat) 52 calories
  • Lite White (1.4% fat) 47 calories
  • Skim 35 calories

Using these energy values  as a guide,  half  a cup  of  plain homemade yoghurt has an impressive calorie count ranging from 51 calories ( using skim milk) to 88 calories (using full cream milk) per serve.

For my first batch of homemade yoghurt I used four cups full cream milk and three tablespoons of Greek yoghurt. Simply leaving my jars to ferment on the kitchen bench overnight. Swaddled in tea towels. Truth be told I was more than a little dubious about whether this would work but as the saying goes; nothing ventured, nothing gained. In the morning we were greeted with thick, creamy yoghurt. Milder in flavour and less tangy than the commercial variety we know and love but delicious nevertheless. In fact half our household preferred it this way. In the interests of experimentation I simply left one jar on the kitchen bench for a few more hours to see if this would result in a stronger tasting, tangier yoghurt. It worked. So now everyone is happy.

How to use my jar of yoghurt?  It’s an incredibly versatile ingredient and here are some ideas:

  • On its own straight out of the tub, it makes a wonderfully healthy snack at any time of day.
  • Add a little cucumber, garlic, lemon  and herbs, its transformed into a deliciously tangy tzatziki dip. Which also doubles as an accompaniment for any meal. Particularly delicious with grilled chicken or lamb, or dolloped on top of a couscous salad.
  • Substitute thick creamy Greek yoghurt for sour cream or mayonnaise in salad dressings. The Green Goddess dressing made with avocado, herbs and yoghurt is one of my favourite fast day discoveries.
  • For a very easy breakfast or a late brunch serve yoghurt with fresh fruit or compote and a sprinkling of granola, or in a more substantial Bircher Muesli.
  • And last but not least let’s not forget fresh fruit smoothies. Incredibly refreshing on a hot summer’s day.

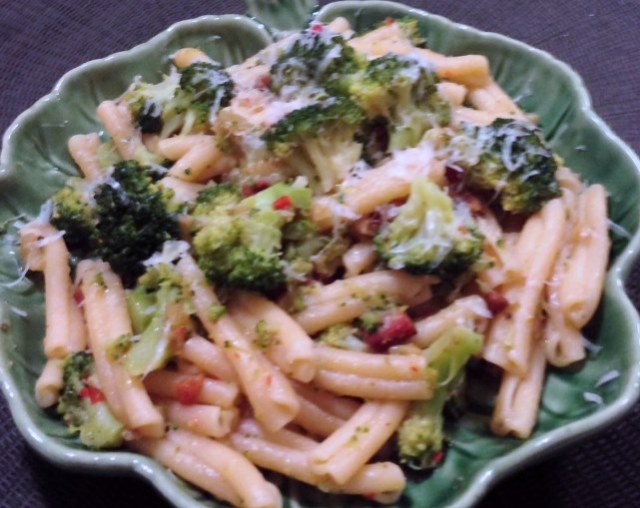
On my fast day I simply ate my home made yoghurt out of the jar with a little fruit. As always here is my latest fast day on a plate. A little over my 500 calorie limit. Entirely due to the unnecessary teaspoon of sugar in my evening cup of tea. Old habits really do die hard.

Breakfast
2 Cups of Tea
4
Lunch
Small Mandarin
28
1/2 Cup Home Made Yoghurt
88
Mid Afternoon
2 Cups of Tea
4
Dinner
Chicken Stir Fry With Rice
370
1 Cup of Tea With Teaspoon Sugar
18
Total Calories
512

Home Made Yoghurt In A Jar
Based on a recipe from Bon Appetit

Makes 4 generous cups (88 calories per 1/2 cup serve or 11 calories per tablespoon)

If you like Greek-style yoghurt, let the finished product drain in a cheesecloth lined sieve set over a bowl to thicken. As Greek Style yoghurt is thicker and creamier when strained these quantities  will yield approximately 3 cups Greek yoghurt which has a more generous calorie count of 116 calories per 1/2 cup serve or 15 calories per tablespoon.

4 cups whole milk (640 calories)
3 tablespoons thick yogurt with live and active cultures (60 calories)

START with all ingredients at room temperature.
HEAT milk in a saucepan over medium heat, stirring and scraping bottom of pan often with a heatproof spatula (for a smooth yoghurt, take care not to incorporate too much air), until milk is almost at boiling point. Temperature will register 85 C (185 F) if using a candy thermometer.
REDUCE heat to low and cook milk, without stirring or letting it boil for 20 minutes.  With a thermometer this means keeping the heat constant at 85 C (185 F).
PLACE pan in a large bowl or sink filled with cold water. Let cool to lukewarm, stirring constantly. At this point the thermometer will register 45 C (110 F).
MIX 3 tablespoons of yoghurt  (homemade or commercial) with 3 tablespoons of  the cooled milk. Add the mixture to the pan of milk, stir gently to combine.
POUR mixture into sterilised jars (instructions follow).  Wrap the jars in tea towels  and place in a warm spot in kitchen for at least 8 hours (or overnight) until it thickens. Do not disturb the jars. The longer the yoghurt is allowed to stand the thicker and tangier the yoghurt will be.
COOL in the refrigerator before using. As the yoghurt cools it will continue to set.
USE within a week. Remember to reserve 3 tablespoons for your next batch.

Sterilising  Jars

PREHEAT oven to 110°C. Wash jars and lids in hot, soapy water. Rinse well. Place  in a deep saucepan. Cover with cold water.
BRING water to the boil over high heat. Cover pan. Reduce heat to medium and boil gently for 10 minutes.
LINE a baking tray with a clean tea towel. Using metal tongs, remove jars and lids from boiling water and place upside down on tray. Place in oven and heat for 15 minutes.
REMOVE from oven and allow to cool. Jars are ready to be filled.


Posted in Breakfast, What I Love to Cook | Tagged , , , , , , , | 6 Comments

Sunday Night Dinner. Family Food. Italian Meatballs With Ricotta and Parmesan Cheese and a Rich Tomato Sauce.

Italian Meatballs With Ricotta and Parmesan

Sunday night dinner after a busy weekend. Is there anything more comforting than meatballs in a rich tomato sauce? Perfect family food for a cold winter’s night. Our favourite meatball recipe features ricotta and parmesan cheese. The result? Meltingly soft and tender meatballs. Full of flavour. Hearty. Rustic. And very moreish. So much so I always make a double batch.

Italian Meatballs With Ricotta and Parmesan Cheese and a Rich Tomato Sauce

Serves 4

400g box of dried pasta, I like to use tagliatelle
1/4 cup grated Parmesan to serve

For the Meatballs
6 tablespoons olive oil
1 onion, finely chopped
3 cloves garlic, crushed
2 tablespoons parsley, roughly chopped
1 tablespoon basil or rosemary, roughly chopped
3/4 cup  fresh breadcrumbs
1 cup ricotta cheese
3 tablespoons Parmesan cheese, grated
1/2 teaspoon fresh nutmeg, grated
zest of 1 large lemon, grated
1 egg, lightly beaten
500g pork and veal mince
parmesan, grated as garnish to your taste

For the Sauce
2 tablespoons olive oil
1 large brown onion, finely diced
3 cloves of garlic, crushed
2-3 teaspoons crushed chilli flakes
1/2 cup white wine
2 x 400g tins of chopped tomatoes
2 tablespoons parsley, finely chopped
a good pinch of sugar
a dash of balsamic vinegar
sea salt flakes and freshly ground pepper to season

Prepare the Meatballs
HEAT two tablespoons of olive oil in a saucepan and cook the onion until soft and translucent. Add the garlic and cook a few minutes more, set aside to cool.
PLACE the herbs, breadcrumbs, ricotta, parmesan, lemon zest, nutmeg and egg in a bowl. Add the mince and the cooled onion and garlic.
SEASON generously with salt and pepper and mix to combine. Rest the mixture in the refrigerator for at least 30 minutes, or overnight.
SHAPE tablespoons of the meat mixture into balls and dust lightly with a little flour.
HEAT the remaining olive oil in a large shallow fry pan or wok. Fry the meatballs until golden brown on all sides. If necessary cook them in two batches and make sure there is enough oil to prevent them sticking to the pan. Remove and set aside.

Prepare the Tomato Sauce
IN A large shallow frying pan over medium heat, sauté onion in olive oil with a pinch of salt until translucent. About 5 minutes
ADD garlic and crushed chilli flakes. Sauté until fragrant.
DEGLAZE the pan with the white wine, stirring well until the wine has evaporated.
ADD the canned tomatoes and cook until the sauce begins to thicken. Break down the tomatoes with the back of your wooden spoon as you stir.
ADD herbs,balsamic vinegar and sugar. Stir well to combine. Turn the heat down to low and simmer until  the sauce is rich and thick.

Assemble the Dish
RETURN cooked meatballs to the pan, reduce heat to a low simmer and gently warm through. Season to taste with salt and pepper.
MEANWHILE cook pasta in a large saucepan of salted boiling water according to the instructions on the back of the box until al dente.
DRAIN the cooked pasta and toss through the meatballs and sauce. Sprinkle with chopped fresh herbs and grated Parmesan cheese to serve.

Posted in Beef, Pasta, Pork, What I Love to Cook | Tagged , , , , , , , | 7 Comments

Old Fashioned Baking. Light and Delicate. Vanilla Butterfly Cakes With Strawberries and Cream.

Vanilla Butterfly Cakes With Strawberries and Cream

I love old fashioned baking recipes. Uncomplicated. Down to earth. Practical. Using nothing more than basic pantry ingredients. This cupcake recipe is a staple in our house. A birthday party and afternoon tea treat resurrected from my childhood. Light. Delicate. Buttery. The perfect foil for these gorgeous butterfly cakes. Put together with fresh strawberries and cream and a dusting of icing sugar. So delicious they don’t last long at all.

Vanilla Butterfly Cakes With Strawberries and Cream.

Makes 10 Cupcakes

For the Cupcakes
125 grams unsalted butter, softened to room temperature
1/2 cup caster sugar
1 teaspoon vanilla extract
2 eggs
1 cup self raising flour
3-4 tablespoons milk

For the Butterfly Wings
1 cup cream
1 tablespoon caster sugar
a few drops vanilla essence
1/2 punnet strawberries
Icing sugar for dusting

To Bake the Cupcakes
PREHEAT oven to 180C. Line a muffin pan with 10 paper cases.
CREAM butter, sugar and vanilla in a mixing bowl until very light and fluffy.
BEAT in eggs one at a time until well combined.
FOLD in flour and just enough milk to achieve a batter of dropping consistency.
SPOON the batter  evenly into the paper cases. Bake in preheated oven for 15 – 20 minutes or until a skewer inserted into the centres comes out clean. Place on a wire rack to cool.

To Assemble the Butterfly Cakes
WHIP one cup of cream with a tablespoon of caster sugar and a few drops of vanilla extract.
SLICE strawberries lengthwise into two or three slices, depending on size.
USE a sharp knife to cut a shallow V-shaped piece out of the top of each cupcake. Cut the top pieces of cake in half crossways to form 2 semicircles. Fill the centres of each cupcake with a heaped teaspoon of cream. Arrange 2 semicircles of cake and 2 slices of strawberry  over the cream to form wings.
DUST with icing sugar.

Posted in Baked, Sweet Treats, What I Love to Cook | Tagged , , , , , , | 7 Comments