Simple and Delicious. Chorizo, Capsicum and Tomato Pasta. Dressed with Lemon and Coriander.

chorizo pasta
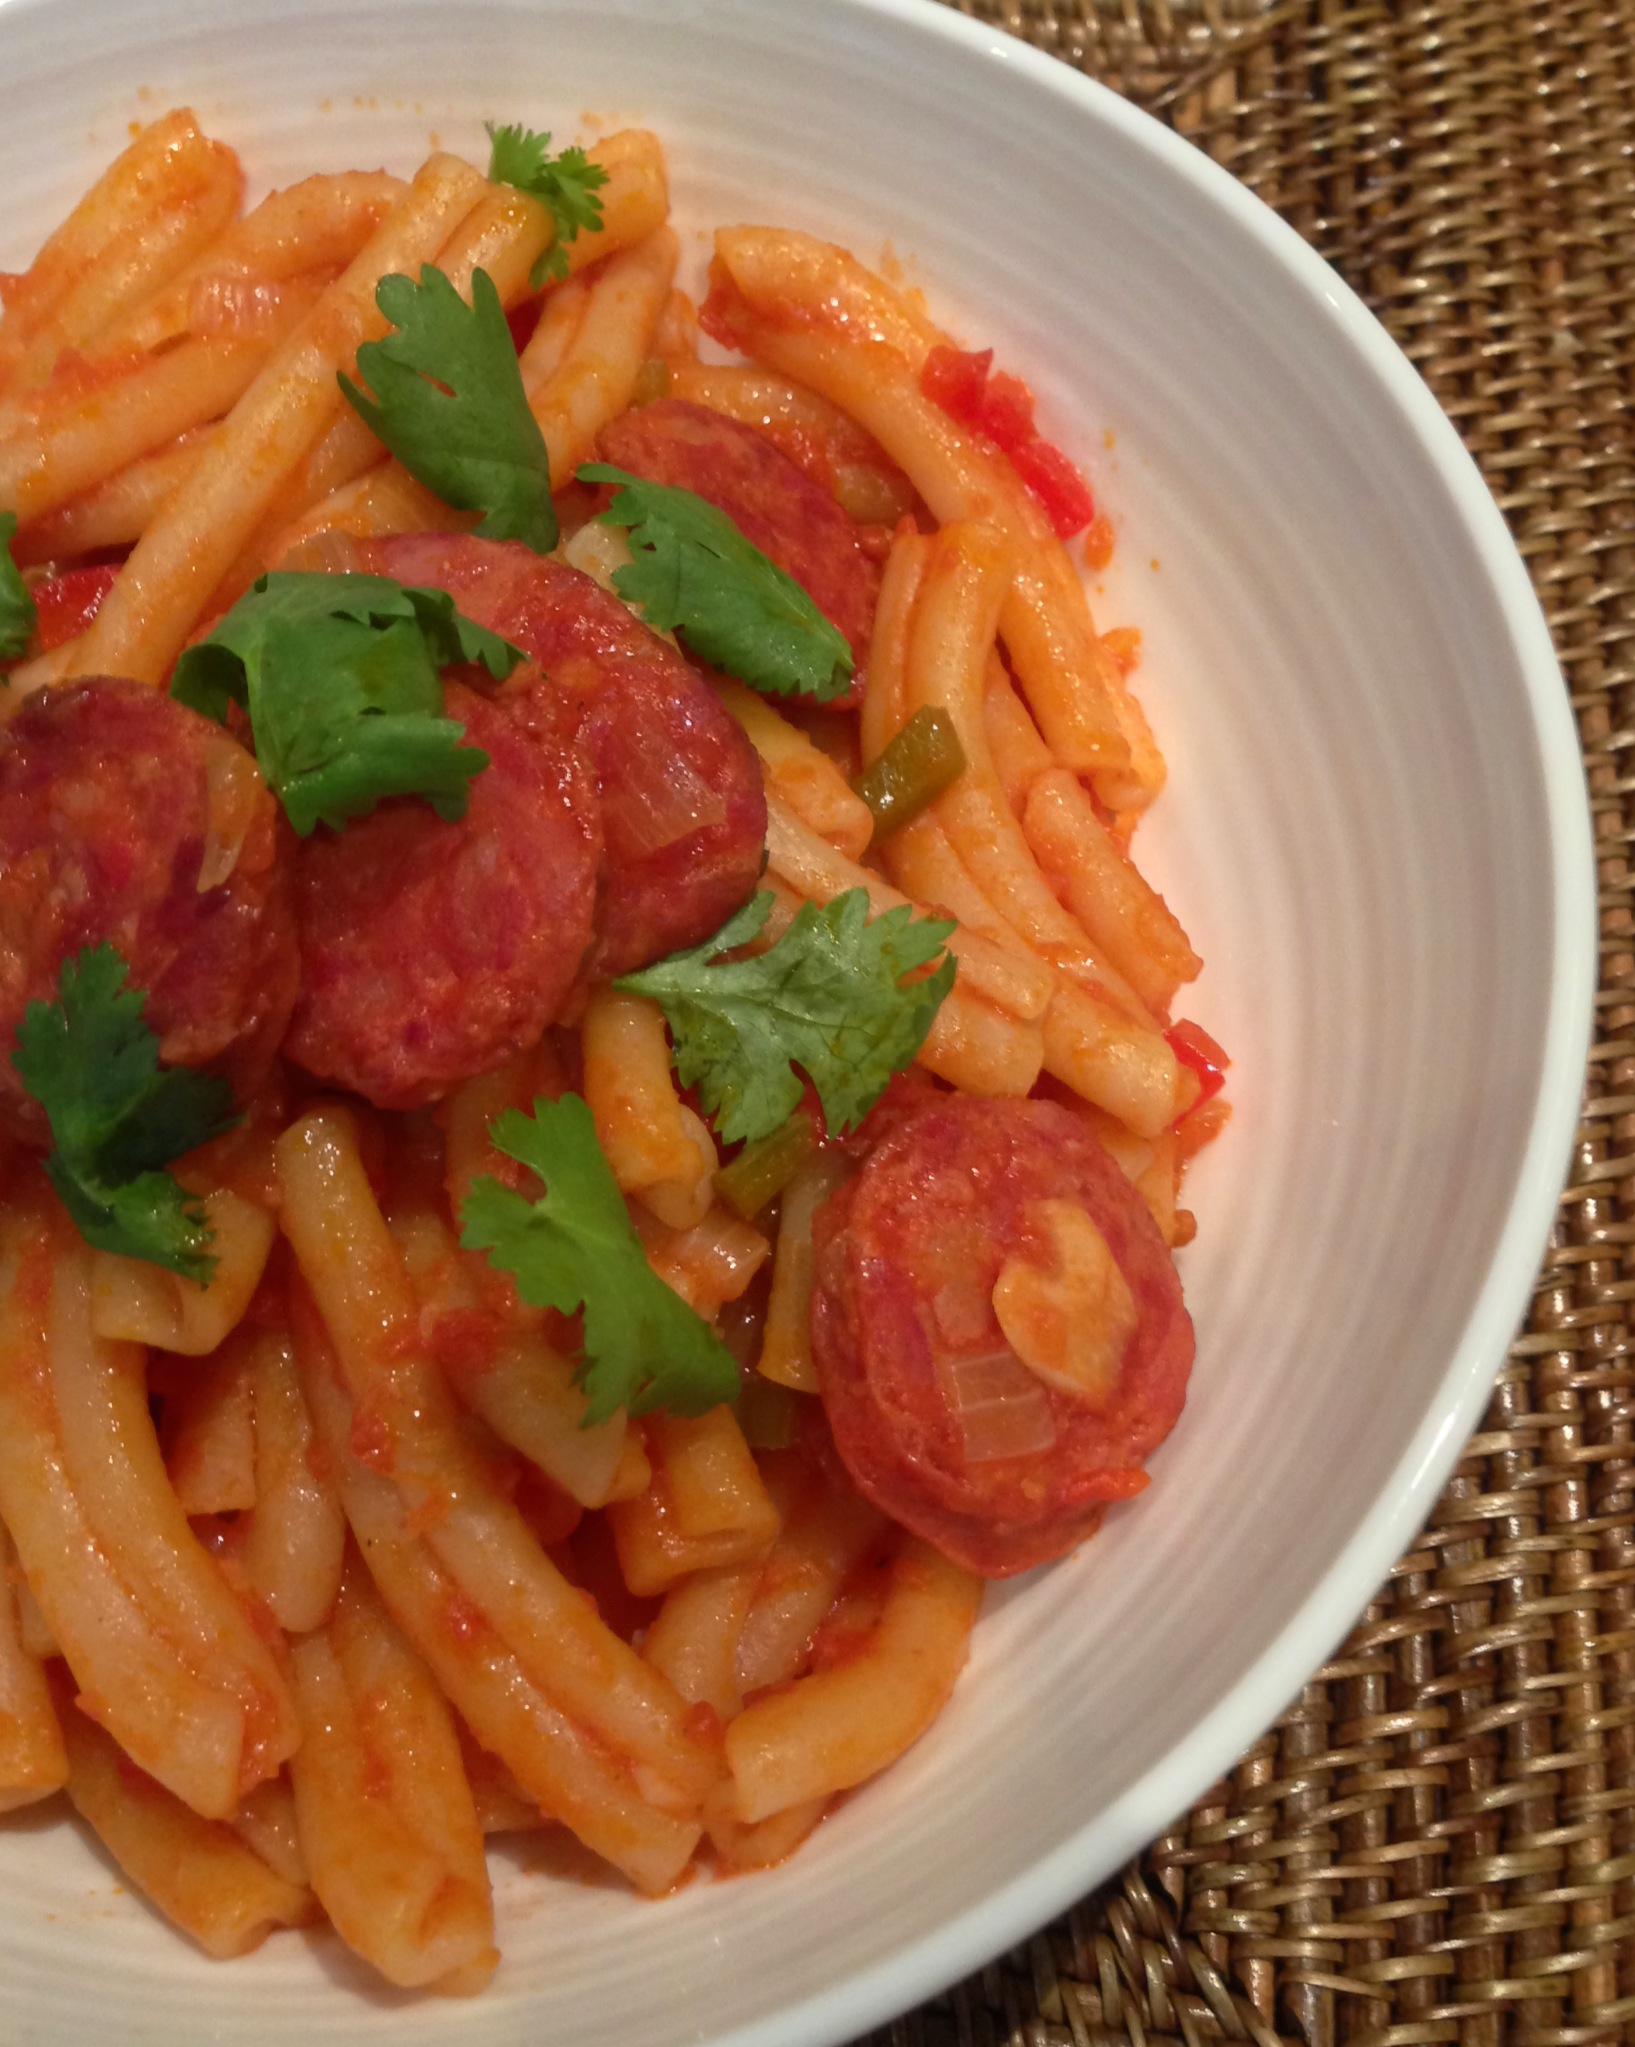
This is what I cook when I don’t know what to cook. A simple and delicious fall back option. Another firm, family favourite. It incorporates the holy trinty of spicy chorizo, capsicum and chillies simmered in a tomato sauce.  I like to dress this pasta with lemon and coriander  to give it a fresh and zingy finish.

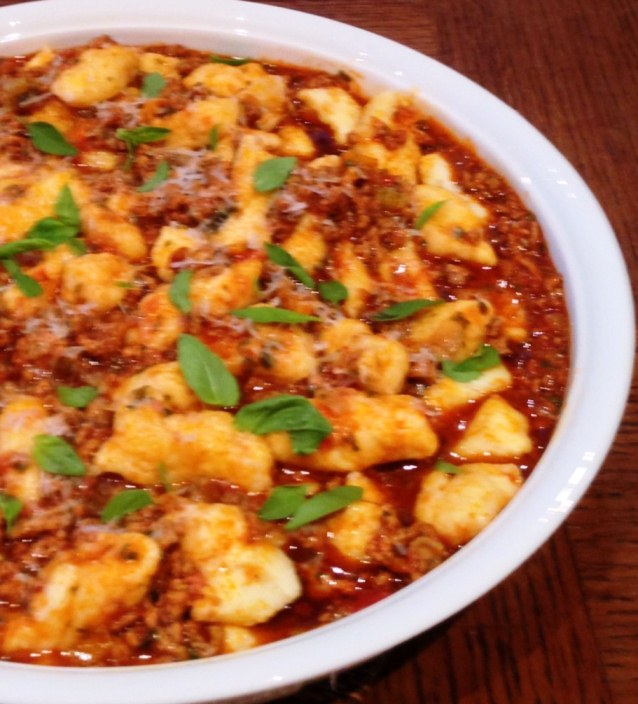
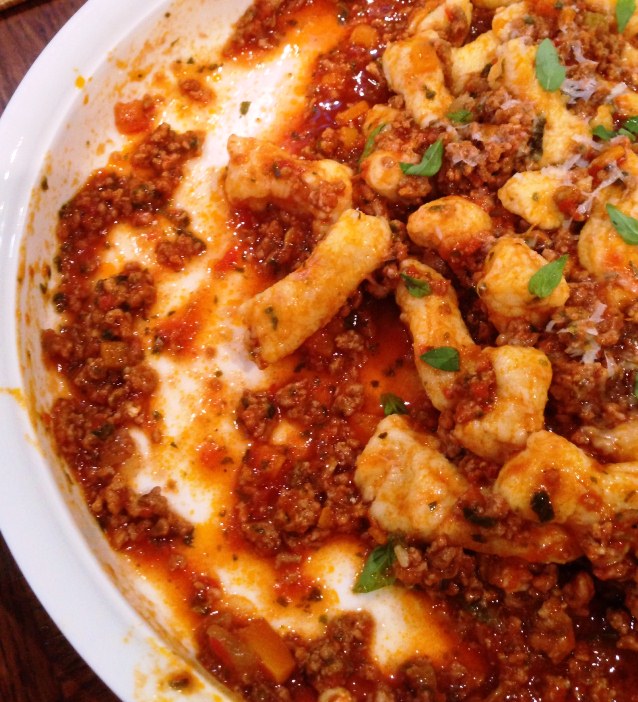
Chorizo, Capsicum and Tomato Pasta with Lemon and Coriander

Serves 4

500 g box of dried pasta, penne, fusilli or casarecce works best in this dish
500 g chorizo sausages, sliced on the diagonal
1 tablespoon olive oil
1 spanish onion, finely sliced
1 red capsicum (pepper) diced
1 green capsicum(pepper), diced
2 cloves garlic, minced
1 small red bullet chilli, minced
1 can crushed tomatoes
1 teaspoon sugar
1 teaspoon sweet paprika
zest and juice of 1 lemon
coriander, leaves stripped from stem to garnish

HEAT oil in a large frying pan. Sauté the chorizo slices until crisp and golden.

ADD red and green capsicum (peppers), onion, chilli and garlic in the pan. Sauté  stirring often. If necessary, add more olive oil to pan.

ONCE the onions are soft and translucent, add a can of crushed tomatoes, sugar and paprika. Stir and cook on medium-low for 10 minutes, being careful not to burn the sauce. Add a little water if sauce looks too dry.

WHILE the sauce is simmering,  bring a separate pan of water to a rolling boil.  Add pasta and cook until al dente – about 10 minutes. Drain.

ADD cooked pasta, lemon zest and juice to the sauce in the frying pan. Mix well to combine with the sauce.

GARNISH with fresh coriander leaves.

Posted in Pasta, What I Love to Cook | Tagged , , , , , , , | Comments Off on Simple and Delicious. Chorizo, Capsicum and Tomato Pasta. Dressed with Lemon and Coriander.

A Very Modern Take on a Classic. Prosecco Poached Peaches with an Orange Scented Jelly and Vanilla Panna Cotta Cream.

peaches

The stone fruit this summer has been absolutely sensational. I came home from the market laden with a box of gorgeous peaches. Sweet. Intensely aromatic. Ideal for poaching.  A perfect pairing for the long forgotten bottle of Prosecco I found lurking in the depths of the refrigerator. From our Christmas celebrations. No doubt.

Peaches poached and peeled , I turned my attention to the syrup. Floral. Fruity. Pure ambrosia. Yes it would be delicious spooned over the peaches and served with vanilla ice-cream for dessert. But it deserved better than that.

The scent of those peaches and their syrup transported me back to the summers of my childhood. Long, hot summers. Peaches and cream. Peaches and ice-cream. Peaches set in jelly for dessert with the obligatory scoop of ice cream on the side. A very special treat. More often than not it involved tinned Ardmona canned cling peaches. Set in good old Aeroplane jelly. I well remember those packets of jelly crystals which we dissolved in water. Served with Norco Vanilla Ice Cream. From the tub.

Here is my very modern take on that childhood classic. A perfect Prosecco poached peach. Served whole. The orange scented poaching syrup transformed into a jelly. Layered on top of a  vanilla panna cotta cream. The taste and scent of summer. Past, present and future.

peachesandjelly

Prosecco Poached Peaches with an Orange Scented Jelly and Vanilla Panna Cotta Cream.

Serves 6 

For the peaches

6 fresh peaches
1 750 ml bottle Prosecco
1 ½ cups caster sugar
1 vanilla bean, sliced lengthwise
1 cup freshly squeezed orange juice
finely grated zest of 1 orange

COMBINE Prosecco, sugar, vanilla bean, orange juice and zest in a saucepan.
STIR over medium heat until sugar dissolves.
ADD peaches. Cover with a round of baking paper and weight using a small plate. Bring just to the boil. Reduce heat to low and simmer for 10 minutes or until peaches are just tender.
REMOVE saucepan from heat.  Remove plate and  baking paper from saucepan. Allow peaches to cool completely in syrup. When cool, remove from the syrup and peel. Skins should slip away easily from the fruit.
STRAIN syrup through a fine sieve over peaches. Store peaches covered in the refrigerator until required. Three cups of the poaching syrup will be required for the jelly.

For the vanilla panna cotta cream

450 ml pouring cream
2 tablespoons caster sugar
1 vanilla bean, sliced lengthwise
1 ½ leaves of gelatine (titanium strength), softened in a little water for 5 minutes

PLACE cream, sugar, and split vanilla bean in a small saucepan. Bring to a gentle simmer over medium-high heat.
SQUEEZE excess water from gelatine, add to cream mixture, stir to dissolve.
DISTRIBUTE evenly amongst 6 small glass tumblers.
REFRIGERATE immediately. This layer should be set sufficiently within an hour so that the peach jelly layer can be added to the glasses

For the jelly

3 cups of the peach poaching syrup, strained
4 leaves of gelatine (titanium strength) softened in a little water for 5 minutes

PLACE 1 cup of the poaching syrup in a small saucepan and warm over medium heat.
SQUEEZE excess water from the gelatin leaves. Add gelatine to pan and stir until gelatine dissolves.
STIR gelatine mixture into remaining 2 cups of peach poaching syrup.
POUR syrup into a jug. Leave on the kitchen bench to cool.
REMOVE the glass tumblers from the refrigerator. Check that the vanilla cream layer has set sufficiently to withstand the addition of the peach jelly.
CAREFULLY pour the peach jelly evenly over the partially set vanilla cream and refrigerate until set.

Posted in Fruit, Sweet Treats, What I Love to Cook | Tagged , , , , , , , , | 4 Comments

Double Happiness. Chocolate Cupcakes with Chocolate Topping.

ChocolateCupcakes

The long summer holidays are officially over. Time to resume my back to school baking. Here’s a very special lunch box treat. Soft, moist, decidedly moreish cupcakes. Chocolate upon chocolate. Double happiness. Guaranteed to put a smile on anyone’s face.

Chocolate Cupcakes with Chocolate Topping

Makes 15

For the Cupcakes

1/3 cup cocoa
1 1/2 cups castor sugar
1/2 teaspoon bicarbonate of soda
150 g butter
1 cup water
2 eggs
1 teaspoon vanilla extract
1 1/2 cups self-raising flour

For the Chocolate Topping

200g block dark chocolate; chopped into pieces
3 teaspoons vegetable or olive oil

Baking Instructions

PREHEAT oven to 180C

LINE a 12 hole cupcake tin plus half a six hole tin with cupcake wrappers.

COMBINE water, sugar, butter, cocoa and bicarbonate soda in a saucepan and bring to a simmer but do not boil, stirring until the sugar has dissolved and the butter has melted. You will need to watch the pan like a hawk at this point as the bicarbonate of soda will cause the mixture to fizz, keep stirring to stop it  from overflowing.

TRANSFER mixture to a bowl and leave to cool for 30 minutes. Beat in the eggs and vanilla. Stir in the flour and mix well.

POUR evenly into the paper lined cupcake tins. Be warned, the mixture will be a little runnier than a regular cake batter.

BAKE in a moderate oven 180°C (not fan-forced)  for 15 minutes or until cooked. Centre and upper rack positions are best.

COOL for 10 minutes before placing  onto a wire rack to cool completely.

PLACE chocolate and olive  oil into a  clean and completely dry jug and  microwave on low for about 90 seconds. Stir every 30 seconds until melted. Pour evenly over cupcakes, decorate and refrigerate until firm.

Posted in Baked, Chocolate, What I Love to Cook | Tagged , , , , , | 4 Comments

Spanish Tapas. Tortilla de Patatas. Potato Omelette.

tortilla

Its lunchtime and pouring with rain outside. The NSW and Queensland coasts are bracing for severe flooding. This crazy Australian summer weather. Heatwaves and bush fires one minute. Cyclones, storms and flooding the next. I’m not venturing out today. A quick scan through my refrigerator. Potatoes, onions, eggs and cheese. All the essential ingredients for a Spanish Tortilla de Patatas.

Often served in Spanish restaurants as part of a tapas menu, this rendition of an omelette generously filled with fried potatoes and onion is truly delicious. I’m going to serve it cut in wedges with a salad. If there are any leftovers, we can serve it sandwich style. As bocadillos.  Slices of tortilla topped with  whole roasted peppers or tomatoes in   fresh baguettes.

tortillawhole

Tortilla de Patatas. Potato Omelette.

 Serves 4

250 ml (1 cup) olive oil plus 1 tablespoon
4 medium-sized potatoes, peeled, quartered and thinly sliced
1 onion, peeled, quartered and thinly  sliced
2 cloves garlic, peeled and left whole
85 g Gruyère cheese, grated.
1 tablespoon sage, finely chopped
6 eggs
sea salt and freshly ground pepper

HEAT  1 cup  oil in a large frying pan and gently fry the potato, garlic and onion until almost soft, stirring from time to time so that they don’t burn on the bottom of the pan.
DRAIN in a colander to get rid of the excess oil. The potatoes should be soft but not crisp. Remove  garlic cloves from the potato and onion mixture.
BEAT eggs in a separate bowl.  Stir in cheese and sage. Check seasoning.
WIPE the frying pan clean. Heat the remaining tablespoon of oil in the frying pan on a moderate heat.
TIP in the potato and onion, then the egg, sage and cheese mixture. Turn the heat to low and cook for 10 minutes until nearly set. Shake the frying pan from time to time so that the tortilla doesn’t stick to the bottom.
PLACE pan under a hot grill, cook for a couple of minutes more until the top is set and golden.
SLICE into wedges and serve with a green salad.

Posted in Cheese, Eggs, Vegetarian, What I Love to Cook | Tagged , , , , , , , , , | Comments Off on Spanish Tapas. Tortilla de Patatas. Potato Omelette.

Melt in your Mouth. Pillows of Air. Home-Made Potato Gnocchi With Bolognese.

gnocchipotato

It would be fair to say that in our house home made potato gnocchi served with bolognese sauce and a generous grating of parmesan cheese is a perennial favourite. I think of home made gnocchi and these adjectives spring to mind . Delicate. Feather light. Soft and plump. Melt in your mouth. Pillows of air. Worlds apart from some of the heavy, dense, almost bullet like renditions that are commercially produced. Contrary to popular opinion gnocchi are not so difficult to make. From scratch in your home kitchen. All you need is old, floury potatoes, a potato ricer and a light hand.

Two years ago while we were holidaying in Japan, my friend Motoko presented me with a beautiful bag of home-grown Hokkaido potatoes. One look at them and I just knew they would be perfect for gnocchi. Only problem was that we didn’t have and couldn’t source a potato ricer. To give you an idea how much my children adore gnocchi they offered to rice the cooked potato. Through a garlic press. And they did. Full marks for initiative and lateral thinking. A ricer does quite resemble an oversized garlic press. Let me tell you. Those gnocchi were delicious.

Fast forward to this year. We returned to Japan. Armed with a potato ricer. Motoko and I spent an afternoon making gnocchi from her latest harvest of home-grown Hokkaido potatoes. Needless to say those potatoes were magnificent.  That night we had for dinner some of the lightest, airiest gnocchi I have ever eaten.

gnocchidough gnocchishaping

Here are the seven rules I follow to make feather-light gnocchi. I like to think of them as my holy grail for perfect gnocchi.

  1. Use old, all-purpose, floury potatoes. In Japan we used Hokkaido potatoes. Varieties like Desiree and Toolangi Delight seem to work best here in Australia. 
  2. Do not peel your potatoes before you boil them. Keep the skin on, and whatever you do try not to over boil them. You don’t want the skin to crack open water logging the flesh. Remember, dry potatoes produce feather light gnocchi. Peel the potatoes when they are just hot enough to handle. Use rubber gloves to protect your hands. 
  3. Likewise rice the potatoes ( i.e. pass them through the potato ricer) when they are still steaming hot. Spread the shredded potatoes in an even, thin layer over your work bench to cool. This allows the steam to escape. The less moisture in the potatoes as you start kneading the dough, the less flour you will need to add. The lighter the result. 
  4. Don’t overwork the dough. Forming  the dough should take no longer than 10 minutes. It should be firm, but lightly sticky for best results. A good rule of thumb? Slice the dough in half. Examine its texture. It should look like cookie dough peppered with small holes.
  5. When the dough is ready, work quickly to divide the dough into manageable portions. Roll each portion into broomstick width sized logs, cut into pieces and form the gnocchi. Remember to dust your work surface and  hands with flour as you go.
  6. Cook or freeze the gnocchi immediately. To freeze them, put a flour dusted tray of  gnocchi directly into the freezer. When they are solid, transfer them from the tray into a resealable plastic bag. 
  7. Cook gnocchi in batches. In plenty of salted, boiling water. Allow them to float to the top of the pot and leave to cook for up to a minute before removing with a slotted spoon. The cooking process shouldn’t take more than 2-3 minutes per batch.  

gnocchiserved

Potato Gnocchi

Pictured served with our favourite bolognese sauce, picked basil leaves and a good grating of Parmesan

Serves 4

700 g baking potatoes ( about 4 medium sized potatoes but best to weigh)
3/4 teaspoon salt
1/2 nutmeg, finely grated
1 large egg, beaten well
1 1/2 cups all-purpose flour, plus extra for dusting your hands and bench when kneading

BOIL the potatoes in water to cover until tender. Don’t let them overcook to the point that their skins split. Drain.
AS SOON as the potatoes are cool enough to handle, peel them and put them through a ricer.
SPREAD the potato shreds out on a clean bench. Sprinkle with salt to help them dry out. Cool for at least 20 minutes.
POUR the beaten egg over the cooled, shredded potatoes, and then nutmeg and one cup of the flour. Mix together with your hands to incorporate.
KNEAD lightly, adding a little more flour as necessary until the dough is manageable and not too sticky.
BREAK off a portion of dough and roll to 1 cm in thickness on a floured board. Cut into 3 cm lengths and indent each piece on a fork.
PLACE on a floured tray until ready to use. Continue this process until all the dough is used up.
COOK the gnocchi in batches in a large pot of salted boiling water.
REMOVE with a slotted spoon about a minute after they rise to the top.
SERVE with your favourite pasta sauce.

Posted in Beef, Pasta, What I Love to Cook | Tagged , , , , , , | 7 Comments

Firing Up the Barbie. T-Bone Steak. The Tuscan Way.

t-bone

Firing up the barbie. I can’t think of anything more quintessentially Australian. A great, laid back Aussie summer tradition. I love a good steak on the barbie. Thick. Juicy. Tender. Perfectly charred. The easiest way to achieve this? The Tuscan way. Here is my take on this Italian classic. Cooked on the barbie this Australia Day Long weekend. A celebration of our truly multicultural society.

t-bonetuscan
Take one behemoth of a T-bone steak. Grass fed. Dry aged. Weighing in at a hefty one and a half kilograms. Impressive to behold. Be sure to select your meat carefully. A friendly chat with a good, local butcher always helps to secure a great cut of meat.

Bring your meat to room temperature before cooking . Throwing a cold steak on the barbecue will always result in tough meat. No doubt about it. Simply put the fibres will seize and contract as they hit the high heat of the grill. Minimise the contraction by bringing the steak to room temperature. A T-bone steak this size will require a good 2-3 hours out of the refrigerator before grilling.

Once the steak has been grilled to perfection you’re not done. Let the steak rest before slicing or eating. This gives the fibres time to relax and allows the juices to redistribute throughout the meat. The result? A tender, juicy piece of steak. This really is the most important step. I let my T-bone steak rest for a good 15 minutes after it comes off the BBQ plate.

Just enough time to get organized and prepare the salad. This time I served our steak with a roasted beetroot salad. Often I just prepare a simple fennel and rocket salad. Or even more simply, dress the steak with rocket, balsamic and lemon wedges. How easy is that? A perfectly cooked steak with loads of wow factor with very little effort. On this occasion grilled by my teenage son. Try it. You’ll see.

t-bone

Barbecued T-Bone Steak. The Tuscan Way.

Serves 6

1 T-Bone steak, dry aged, grass-fed, at least 7 cm ( 3 fingers) thick, weighing about 1.5 kg
1 tablespoon chopped fresh rosemary
1 tablespoon chopped fresh sage
1 tablespoon fresh thyme leaves
2 tablespoons sea salt, plus more to taste
2 tablespoons freshly ground black pepper, plus more to taste
2 tablespoons pure olive oil

REMOVE T-bone steak from the refrigerator 2-3 hours before cooking.
PREHEAT BBQ to high.
IN A small bowl, mix together the rosemary, sage, thyme, salt and pepper until well blended. PAT the steak dry and coat the entire steak with the herb mix. Brush gently with the pure olive oil.
PLACE T-Bone steak on a smoking hot grill plate and cook until well charred, about 8 minutes on first side, and 6 minutes on the second side. Because this steak is so thick, use tongs to rotate meat, lightly searing edges to render any fat as you go.
CAREFULLY place the steak vertically on the grill, so it is resting on the flat part of the T-bone. Continue to cook, allowing the heat to transmit through the bone to the meat, for an additional 15 to 20 minutes.
TRANSFER to a plate. Let stand for 15 minutes.
LIGHTLY season the steak with coarse salt.
SLICE eye and strip meat away from the bone, and then crosswise into thin slices. Serve immediately with a simple salad, putting a little of both types of meat (eye and strip) on each plate.

Posted in Beef, What I Love to Cook | Tagged , , , , , , , | 2 Comments

Australia Day. At Bondi Beach. Sun, Surf, Sand and Sausage Rolls.

bondibeach26Jan

January 26. Australia Day. Is there anything more quintessentially Australian than to spend the day at the beach?  Our local beach?  Bondi Beach. Filled with locals and tourists alike enjoying perfect blue skies, sand and surf.  For lunch? Home-made sausage rolls. Lamb of course. Served with lashings of tomato sauce. Happy Australia Day!

lamb sausage rolls

Lamb Sausage Rolls

Makes 32 

1 tablespoon olive oil
1 small brown onion, finely chopped
4 garlic cloves, crushed
1 long red chilli, minced
1/3 bunch mint, leaves stripped from stem and minced
1/3 bunch parsley, leaves stripped from stem and minced
2 teaspoons ground cumin
2  teaspoons sweet paprika
1 teaspoon ground coriander
1 kg lamb mince
1 ½ cups fresh breadcrumbs
2 eggs, lightly beaten
2 tablespoons  hot chilli sauce
3 tablespoons tomato sauce
1 tablespoon soy sauce
4 sheets frozen puff pastry, partially thawed, halved

To glaze
1 egg, lightly beaten
1 1/2 tablespoons sesame seeds

PREHEAT oven to 200°C/180°C fan-forced. Line 2 baking trays with baking paper.
HEAT oil in frying pan over medium heat. Add onion, chilli and garlic. Cook, stirring, for 4 minutes or until onion has softened.
ADD parsley, mint, cumin, coriander and paprika. Cook, stirring, for 1 minute or until fragrant. Transfer to a large heatproof bowl. Set aside to cool for 10 minutes.
ADD mince, breadcrumbs, eggs and the hot chilli, tomato and soy sauces  to onion mixture. Mix until well combined.

To form the sausage rolls.
TAKE ½ cup of the mince mixture and form into a sausage shape with your hands.
PLACE along the long side of 1 pastry half. Brush opposite edge with a little of the remaining egg.
ROLL up pastry, starting from mince side, to enclose filling.
CUT each log into quarters. Place seam-side down on lined oven trays.
REPEAT with remaining mince mixture, pastry and egg to make 32 rolls.

BRUSH the tops of the sausage rolls with lightly beaten  egg. Sprinkle with sesame seeds.
BAKE for 25 to 30 minutes, swapping trays halfway through cooking time, or until golden and puffed. Stand for 5 minutes before serving.

Posted in Lamb, Musings & Inspiration, Small Bites, To Serve with Drinks, What I Love to Cook | Tagged , , , , , , , | 2 Comments

Roasted Beetroot Salad with Honeyed Walnuts and Marinated Goats Cheese.

beetrootroastI’m roasting beetroot for one of my favourite summer salads. And yes. These crimson orbs come from my father’s garden. Of course.

beetroot

Roasted to a nutty deliciousness. Combined with peppery rocket, bitter radicchio, sweet honeyed walnuts and unctuous marinated goats cheese. Layer upon layer of flavour and texture. Sweet but salty. Soft but crisp. My version of a summer beetroot salad. Pretty as a picture.

Whilst this can be served as a substantial salad on its own, we had it as a side. An accompaniment to a gorgeous Tuscan steak. But that deserves its own post. Tomorrow, perhaps.

beetrootsalad

Roasted Beetroot Salad with Honeyed Walnuts and Marinated Goat’s Cheese.

Serves: 4

For the beetroot

8 medium-sized beetroot
2 tablespoons olive oil,
a good drizzle balsamic vinegar,
4 cloves garlic, whole and unpeeled,
2 sprigs marjoram
sea salt and freshly ground pepper

For the honey walnuts

150 g walnuts
2 – 3 tablespoons honey

For the salad

250 g marinated goats cheese
50 g rocket, washed
1 radicchio lettuce, washed
8 green basil leaves torn
8 purple basil leaves torn
two spring onions finely sliced
zest of one lemon
sea salt and freshly ground black pepper

For the dressing

1 tablespoon marjoram leaves, stripped from stem
4 cloves roasted garlic, removed from the roasted beetroot, garlic squeezed out of skins
1 tablespoon whole grain mustard
juice of one and a half lemons
4 tablespoons of extra virgin olive oil
sea salt to taste

To roast beetroot

PREHEAT oven to 200 C.
WIPE or scrub beetroot clean. Place on a large piece of foil; drizzle with olive oil and balsamic vinegar.
SCATTER over garlic cloves, marjoram and salt and pepper.
WRAP foil around beetroot to form a neat packet. Roast in middle of oven until tender, about 1 hour. Test for doneness by piercing the largest beetroot with a knife. If it enters easily, it’s done.
UNWRAP  and let sit until cool enough to handle. Save roasted garlic cloves for dressing. Use your hands or a paring knife to peel skin, then cut beetroot into bite sized chunks or quarters depending on size. Set aside.

To prepare honey walnuts

PLACE walnuts onto paper lined baking tray and drizzle with honey.
ROAST in 200 C oven and roast for 5 minutes or until nuts are toasted and honey has caramelised. Sprinkle with salt whilst still hot. Set aside.

To prepare the dressing

PLACE the marjoram, salt and roasted, skinned garlic cloves in a food processor and pulse to a paste.
ADD the lemon juice and mustard. Whisk until smooth. Stir in the olive oil. Check the seasoning.

To assemble the salad

PLACE warm beetroot into a large bowl and dress with 2/3 of the dressing.
LAYER a large flat salad bowl with rocket and radicchio leaves.
ADD dressed roasted beetroot, crumbled goats cheese, lemon zest and spring onions.
SCATTER with torn basil leaves and honeyed walnuts.
SEASON with lots of freshly ground black pepper, and only a little salt (if any).
DRIZZLE remaining dressing over the salad to finish.

Posted in Musings & Inspiration, Salads, Vegetarian, What I Love to Cook | Tagged , , , , , , , , , | 4 Comments

What’s for Breakfast? Sweetcorn Fritters With Roast Tomato.

corn

This time when we returned from Canberra the boot of our car  was filled with plums, tomatoes, sweetcorn, spinach, sweet basil, capsicum, cucumbers and zucchini. All freshly picked from my father’s garden. And two enormous bunches of hydrangea in hues of pink, lilac and blue.

Our holidays are well and truly over and we are getting back into the swing of things. School might not start until next week, but my daughter is back into her swimming routine. I picked her up from the pool this morning. As usual she was absolutely ravenous. “What’s for breakfast?” she asked.

She particularly loves sweetcorn. Especially from her grandfather’s garden. Not surprisingly this is one of her favourite breakfasts. Sweetcorn fritters with roast tomato. Another classic from Bill Granger. It’s still on the menu at Bill’s Cafe. All day. Served with bacon. We decided to give the bacon a miss today. Putting the focus entirely on our beautifully fresh produce.Somehow things always taste better when you grow them yourself.

cornfritters

Sweetcorn Fritters With Roast Tomato

Serves 4

For the roast tomatoes

4 ripe Roma tomatoes, sliced in half lengthways
4 tablespoons extra virgin olive oil
Sea salt
Freshly ground black pepper

For the fritters

1 cup plain  flour
1 teaspoon baking powder
1/4 teaspoon salt
1/4 teaspoon paprika
2 eggs
1/2 cup milk
2 cups fresh corn kernels from the cob
1/2 cup diced fresh capsicum (pepper)
1/2 cup sliced spring (green) onion
1/4 cup chopped coriander and parsley
4 tablespoons vegetable oil

For the roast tomatoes

PREHEAT the oven to 180 C. Place tomatoes on a baking tray cut side up,and drizzle with olive oil. Sprinkle liberally with sea salt and pepper.
ROAST in oven for 20 minutes.

For the fritters

SIFT flour, baking powder, salt and paprika into a large bowl and make a well in the centre.
IN a separate bowl, combine eggs, and milk.
GRADUALLY add the egg mixture to the dry ingredients and whisk until you have a smooth, lump-free batter. The batter will be quite stiff.
PLACE corn, capsicum, spring onion and herbs in a mixing bowl and add just enough of the batter to bind them.
HEAT 2 tablespoons vegetable oil in a non-stick frying pan on medium heat, then drop in 2 tablespoons of batter per fritter and cook 4 fritters at a time.
COOK for 2 minutes or until the underside of each fritter is golden. Turn over and cook fritters on the other side. Transfer to a plate and keep warm while cooking the remaining fritters.
SERVE with roast tomatoes and rocket.

Posted in Breakfast, Vegetables, Vegetarian, What I Love to Cook | Tagged , , , , , , , , | 5 Comments

From My Father’s Garden and Mother’s Kitchen. Upside Down Plum Cake.

plums

Late January in my father’s garden. The plum trees are absolutely bursting with fruit. Luscious. Sweet and juicy. I can’t recall ever having seen so much fruit on those trees. They are hanging from the low lying branches like big, fat, oversized bunches of purple grapes. Perhaps a testament to my brother’s pruning prowess. Last autumn he pruned the tops of the trees back severely to keep my father from climbing ladders to pick the fruit. It seems to have done the trick.

We picked basket upon basket of plums. Some to be eaten. The rest to be transformed into jams, cakes and slices. Even dried into prunes. For afternoon tea I helped my mother bake a cake. Upside down plum cake with an almond, lemon and yoghurt batter. Divine.

plumcake

Upside Plum Cake with Almonds.

50 g butter
1/3 cup brown sugar
800 g plums, halved, stones removed
1 cup caster sugar
1 1/3 cups self raising flour
1 cup ground almonds
1 teaspoon baking powder
2 eggs, lightly beaten
1 cup Greek yoghurt
150 ml olive oil
zest of 1 lemon, finely grated

PREHEAT oven to 160 C. Grease a 22 cm round cake tin. Line base with baking paper.
MELT 50 g butter in a small saucepan. Stir in brown sugar until well incorporated and dissolved. Drizzle evenly over the base of the cake tin.
PLACE plums cut side down evenly over base of the tin. Start at outside edge of the tin working towards the centre.
COMBINE the remaining dry ingredients – flour, almond meal, sugar and baking powder in a large mixing bowl.
IN ANOTHER bowl combine the wet ingredients – eggs, oil, yoghurt and lemon zest.
FOLD wet ingredients into the dry. SPOON mixture over the plums. Smooth surface.
BAKE cake ins 160 C oven, middle rack position for about 1 hour or until a skewer inserted into the centre comes out clean. Stand cake in pan for 15 minutes. Invert onto a serving plate and peel off baking paper.
SERVE as is, or with cream or ice cream as a dessert.

Posted in Baked, Sweet Treats, What I Love to Cook | Tagged , , , , , , , | 8 Comments