Rustic Baking. Little Coconut Tea Cakes With Passionfruit Buttercream Frosting.

Little Coconut Tea Cakes With Passionfruit Buttercream Frosting

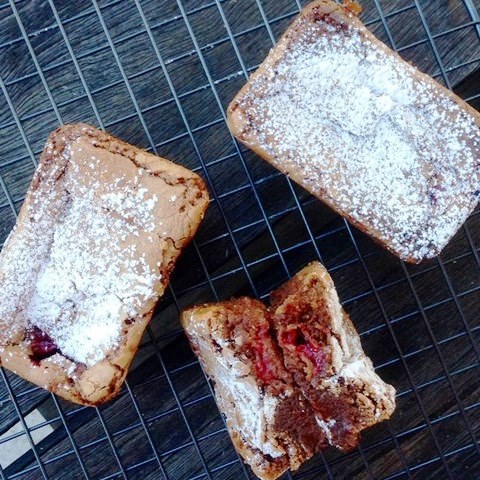
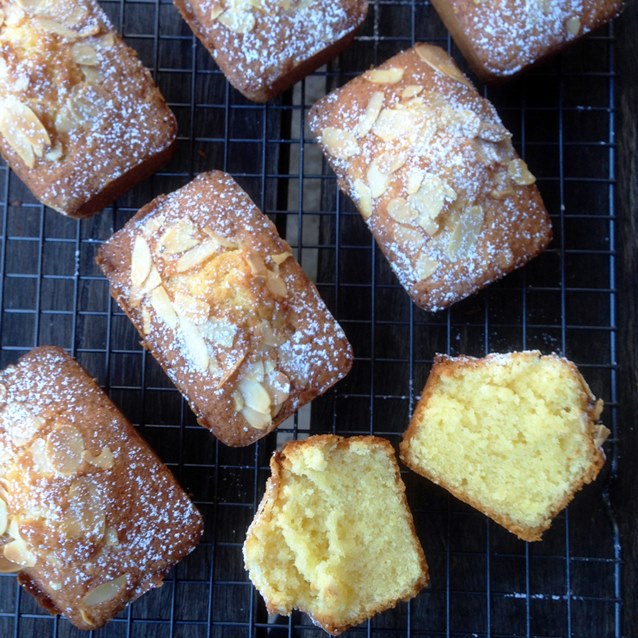
I’m so delighted that rustic, slightly messy looking cakes are right on trend at the moment. A throw back to the pared back naked cake fad which foregoes fancy cake decoration and celebrates the delicious textures and flavours of a well made cake from all natural ingredients. It reflects the way I love to bake and in all honesty, as some one who has never quite mastered the basic of cake decorating 101 it’s such a relief not having to fuss over the final presentation.

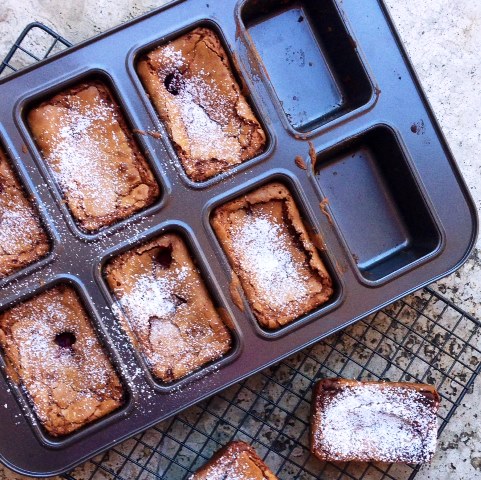
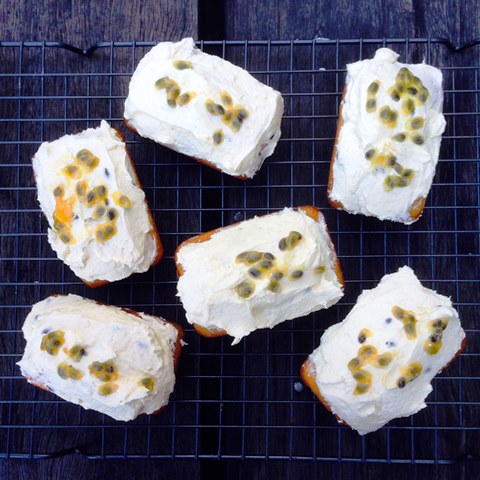
I’ve always loved the tropical summery flavour combination of coconut  and passionfruit. The nostalgia of  endless days spent at the beach, slathered in the tanning lotion du jour, Reef Coconut Oil. The heady evening scent of backyard passionfruit vines laden with gloriously scented fruit. So here I am busting out my mini loaf tray again (I know it’s becoming quite the obsession) and making little coconut teacakes smothered in a generous layer of passionfruit buttercream frosting. Olde worlde pretty baking that just begs to be eaten.

This cake also bakes wonderfully well in a regular sized tin, it just requires a little longer in the oven, up to 55 minutes depending on the vagaries of your oven. The secret to a beautifully moist, deliciously flavoured coconut cake lies in the soaking of the coconut in milk for at least half an hour before baking. For a gorgeously tender crumb, be careful not to overmix the batter, a gentle folding through of the flour and coconut is all that is required.

And if, like me. you can’t go past the combination of coconut and passionfruit here are two more  recipes you might like to try  From The Old fashioned Australian Kitchen Pantry. Passionfruit And Coconut Impossible Pie. or Pure Heaven. Passionfruit Melting Moments With a Roasted Coconut and Passionfruit Butter Cream.

Little Coconut Tea Cakes With Passionfruit Buttercream Frosting
Makes 8 Tea Cakes (or one 20cm round cake)

1/2 cup dessicated coconut
1/2 cup milk
1 3/4 cups self raising flour
a generous pinch of salt
1/2 cup butter
1 cup caster sugar
1 teaspoon pure vanilla extract
2 eggs
2 tablespoons boiling water

THIRTY MINUTES  before baking, soak the desiccated coconut in milk.
PREHEAT oven to 170 C. Position oven racks so the top of the cake tin is roughly in the centre of the oven.
GREASE and flour an 8 hole mini loaf tray or deep 20 cm round cake tin. Line base with baking paper.
SIFT together flour and salt and set aside.
BEAT together butter, caster sugar and vanilla extract until pale and creamy, at least 5 minutes. Add eggs, one at a time, beating until just incorporated.
ADD coconut and milk, stirring until just combined.
FOLD through flour and enough boiling water to ensure batter is of dropping consistency, being careful not to over mix.
SPOON batter into the prepared mini loaf or cake tin. When filled tap the tin gently on the kitchen bench to distribute the batter and smooth the top with a palette knife.
BAKE  for 20 –  25 minutes for the mini loaves or 50 – 55 minuttes for the round cake, middle oven rack position. A skewer inserted into the cakes should come out clean when perfectly baked.
REMOVE from the oven, allow to cool in the tin a little before transferring onto wire rack to cool completely.

For The Passionfruit Buttercream

75g unsalted butter, softened
2 cups icing sugar
pulp and juice of 4 passionfruit, divided

USE an electric mixer to beat the butter and icing sugar until light and fluffy.
ADD  the pulp and juice of two passionfruit to the mixture and continue to beat until well combined.
SPREAD a generous tablespoon of  buttercream over the top of  each tea cake and smooth with a palette knife. Spoon over a little more passionfruit pulp to decorate  just before serving.

Posted in Baked, Sweet Treats, What I Love to Cook | Tagged , , , , , , | 7 Comments

Eat, Fast and Live Longer. A 5-2 Fast Diet Recipe Idea Under 200 Calories. A Crisp Green Salad With Fennel, Pistachio and Blood Orange.

Crisp Green Salad With Fennel, Pistachio And Blood Orange

Early Spring and I’m craving salad again. This simple salad pairs crisp garden fresh salad leaves with the last of the winter season’s fennel, blood oranges and pistachio nuts. So very easy to throw together. At just 189 calories per serve it was today’s perfect fast day lunch. In truth I’d forgotten how satisfying a  well made salad can be, and how long it can take to crunch through a whole plate, tricking my mind into thinking I am devouring a much bigger meal.  Delicious on it’s own or accompanied with a little grilled fish or poached chicken for a more substantial offering.

A Crisp Green Salad With Fennel, Pistachio and Blood Orange
Serves 2 (189 Calories Per Serve)

3 cups mixed salad leaves, (I used butter lettuce, red oak lettuce and wild rocket) (27 calories)
1 small fennel bulb (33 calories)
1 medium blood orange (70 calories)
1 tablespoon pistachio nuts (45 calories)

For The Dressing
1 teaspoon Dijon mustard (4 calories)
1 small shallot, finely minced (7 calories)
1 1/2 tablespoons extra virgin olive oil (180 calories)
1 tablespoon white balsamic dressing (12 calories)
reserved juice fro segmented blood orange (above)
sea salt flakes and freshly ground pepper

DRY ROAST the pistachios by placing them in a frypan over medium heat for a couple minutes until fragrant. Remove immediately to a plate and when cool chop coarsely. Set aside.
USE  a small, sharp knife to cut the peel from the orange, making sure to remove all the white pith. Holding the orange over a bowl to catch any juice, cut on either side of each segment, removing wedges of flesh but leaving the membranes. Place the wedges in a small bowl, and set aside. Reserve the juice to add to the dressing.
TRIM and halve the fennel bulb, then slice as finely as you can using a very sharp knife, vegetable peeler or mandolin. If preparing ahead and not using immediately, squeeze over a little lemon juice, or immerse in acidulated water to prevent the fennel from browning. Remember to drain and dry thoroughly before adding to the salad.
PLACE all the dressing ingredients in a small jar with a good pinch of sea salt and liberal grinding of pepper. Shake well to emulsify.
COMBINE the shaved fennel with the salad leaves in a large bowl. Drizzle over three quarters of the dressing, then toss gently to combine. Season to taste with sea salt flakes and freshly ground pepper.
ARRANGE the dressed fennel and salad leaves on a serving platter.
SCATTER over blood orange segments and dry roasted pistachio, then drizzle over a little more dressing to serve.

Posted in Salads, Vegetarian, What I Love to Drink | Tagged , , , , , , , | Comments Off on Eat, Fast and Live Longer. A 5-2 Fast Diet Recipe Idea Under 200 Calories. A Crisp Green Salad With Fennel, Pistachio and Blood Orange.

Celebrating Father’s Day With A New Pantry Staple. Sweet And Spicy Beetroot Relish.

Spicy Beetroot Relish

You may recall that last  week I muddled my dates and prepared a Rustic Farmhouse Terrine for a Father’s Day lunchtime charcuterie plate a whole week early. The success of that terrine was undisputed. It was enjoyed with great gusto disappearing at lightning speed accompanied by a sweet and spicy beetroot relish.The terrine may be long gone, but I managed to squirrel away a back up jar of that relish for this weekend. A very worthy side kick that is fast becoming our family’s new favourite pantry staple, alongside  the already indisputably popular jars of confit garlic, caramelised onions, and tomato chilli jam that regularly amp up the flavour of any humble meal..

All this week we have been slathering  huge tablespoons of leftover piquant beetroot relish into our sandwiches. My son swears it adds serious street cred to a mean ham and cheese toastie. Slightly sweet and sour with a chilli kick it’s obviously the stuff of a teenage boy’s dreams (and his dad). So much so that this delightful relish will star in my take on the quintessential Australian burger  at our Father’s Day barbecue this weekend.

Rustic Farmhouse Terrine With Beetroot Relish

Spicy Beetroot Relish
Makes sufficient to fill one large 500ml jar

1 tablespoon olive oil
1 large red onion, finely diced
1 heaped tablespoon fresh ginger, grated
1 long red chilli, finely minced
3/4 cup brown sugar, firmly packed
3/4 cup cider  vinegar
1/2 cup apple juice
3 medium sized beetroot, scrubbed, peeled and coarsely grated
1 large green granny smith apple, peeled, cored and coarsely grated
sea salt and freshly ground pepper

HEAT  oil in a small saucepan over medium heat. Reduce heat to low, add onion and cook for about 5 minutes or until onion is soft and transparent. Do not allow the onion to caramelise.
ADD ginger and chilli. Cook for a further 2 minutes until fragrant, stirring often to ensure ginger doesn’t catch on the bottom of the pan.
ADD the brown sugar, vinegar and apple juice. Cook stirring  until the sugar dissolves. Then add the grated beetroot and apple, stirring well to combine. Season with sea salt and freshly ground pepper.
BRING mixture to the boil, then reduce the heat to low. Leave to simmer, stirring occasionally, on low for 30-45 minutes until thick and syrupy.  Timing will depend on the size of your pan, and how thick you like your relish remembering it will continue to thicken as it cools. Use a simmer mat, if you have one, to prevent the relish from sticking to the bottom of the pan as it reduces.
REMOVE from heat and allow to cool to room temperature before spooning into a sterilized jar.

Posted in Marinades, Pastes and Dressings, Vegetables, Vegetarian, What I Love to Cook | Tagged , , , , , , , , | Comments Off on Celebrating Father’s Day With A New Pantry Staple. Sweet And Spicy Beetroot Relish.

Miniaturist Baking. Raspberry Chocolate Brownie Bars

Raspberry Brownie Bars

I’ve been reading Jessie Burton’s fascinating novel The Miniaturist, and by no small coincidence seem to have subconsciously  reverted to baking all manner of cakes, brownies and slices in my newly acquired mini loaf trays. I’m now the proud owner of three such tins having been completely won over by how beautifully the simplest batter is transformed into the most exquisite one person treat.

There is something undeniably decadent and delicious about biting into your very own individual sized mini chocolate brownie bar.  Studded with just the right amount of raspberries, firm and almost  crunchy on the edges, gooey in the centre with a perfectly cracked top. All the best bits of a brownie in one simple package that doesn’t need to be shared with anyone, if you don’t care to. Even better, each brownie is easily transportable. No messy cutting into squares and slices. The perfect offering to fill all those Spring Fair cake boxes that are about to be sent home from school. 

Raspberry Brownies

Raspberry Chocolate Brownie Bars

Makes 8 mini loaf sized bars or 1 large 20cm square brownie

125g unsalted butter, cubed
100g bitter-sweet chocolate, chopped
2 tablespoons honey
1 teaspoon pure vanilla extract or paste.
2 eggs
1 cup caster sugar
3/4 cup plain flour, sifted
a pinch of salt
1 cup frozen raspberries

PREHEAT oven to 180C. Butter and line the bases of an 8 hole mini loaf tin or a large 20cm square baking tin.
MELT butter in a saucepan over low heat. When half melted add chocolate, stirring until it has melted and the mixture is smooth.
REMOVE from heat and allow to cool. Stir in honey and vanilla.
IN A SEPARATE bowl beat eggs and sugar until thick and creamy.
FOLD IN cooled chocolate mixture, then flour, salt and raspberries.
POUR into the prepared baking tin.
BAKE mini brownie bars for 15 minutes (30 minutes for the larger 20cm square tin) centre rack position until well risen and surface just beginning to crack.  Remove from oven and allow to cool a little before removing from the tin. The larger brownie can be sliced into squares. Dust with icing sugar. Serve with ice cream if using as dessert.

Posted in Baked, Chocolate, What I Love to Cook | Tagged , , , , , , | 5 Comments

Eat, Fast and Live Longer. A 5-2 Fast Diet Recipe Idea Under 300 Calories. Chinese Style Egg Omelette.

What to eat on a fast day? Preferably something that’s incredibly easy to prepare, delicious, nutritious and packed full of protein to help keep you feeling fuller for as long as possible. Of course it also has to look appealing on a plate. So vibrant and bursting with flavour that you just can’t help digging in. What can I say. This Chinese style omelette ticks all the boxes. My vegetarian version is full of julienned vegetables but you can easily mix it up and add some freshly cooked prawns, a little poached chicken or lean wok seared beef or pork fillet. A gorgeous 5-2 fast day meal to celebrate the first day of Spring for just 255 calories a serve.

Chinese Style Egg Omelette
Serves 1 generously (255 calories per serve)

50g snow peas, trimmed, thinly sliced (21 calories)
50g bean sprouts, trimmed (15 calories)
1 long green spring onion, thinly sliced (5 calories)
1/4 long red chilli, thinly sliced (2 calories)
1 teaspoon fresh ginger, finely grated (2 calories)
1/2 garlic clove, crushed (2 calories)
2 tablespoons oyster sauce (18 calories)
2 eggs (150 calories)
1 teaspoon olive oil (40 calories)

PLACE sliced snow peas in a heatproof bowl. Cover with boiling water. Stand for a minute then drain into a colander and plunge into a bowl of cold water to refresh. Drain again then combine with sliced spring onion and chilli.
BEAT eggs with a tablespoon of cold water in a bowl until frothy. Season with sea salt and freshly ground pepper
HEAT oil in wok over medium-high heat.  Add egg mixture, swirling to coat. Cook for 30 seconds or until just set.
PILE vegetable mixture over half of the omelette. Fold over to enclose filling, then transfer to a warm plate.
COMBINE ginger, garlic, oyster sauce and 1 tablespoon hot water in a small bowl, drizzle over the plated omelette. Serve immediately.

Posted in Eggs, Vegetarian, What I Love to Cook | Tagged | Comments Off on Eat, Fast and Live Longer. A 5-2 Fast Diet Recipe Idea Under 300 Calories. Chinese Style Egg Omelette.

For The Charcuterie Plate. A Rustic Farmhouse Terrine.

Rustic Farmhouse Terrine

This week I got a little ahead of myself. My husband likes nothing better than to sit down to a long leisurely lunch with a good bottle of wine and a beautifully presented charcuterie plate filled with an array of cured meats, and  a selection of interesting relishes and pickles. With Father’s Day looming on the first Sunday of September, what better opportunity to collect some brownie points and try my hand at making a terrine.

Somehow I muddled my dates. Thinking this Sunday was the first of September I set off in search of a medley of perfect terrine ingredients; coarsely ground pork belly, a little free range chicken livers, smoked streaky bacon and long whisper thin strips pancetta. Ingredients in hand, reality dawned. This Sunday was In fact the 31st August and Father’s Day another week off. There was nothing for it but to push on, much to my family’s amusement.

Rustic Farmhouse Terrine With Streaky Pancetta

For my first serious foray into terrine making I decided to keep things simple and rustic. Just a few beautifully fresh ingredients using a very basic technique. A good, honest farmhouse style terrine that can easily form the basis for a more elaborate offering, Google images of terrines and there is no shortage of beautifully presented labours of love, intricately layered with all manner of gourmet meats, preserved vegetables and dried fruits and nuts.

To make things easy I’ve forensically broken down terrine making into four component parts.; preparing the filling, assembling, baking, then lastly cooling and compressing the terrine.. The whole process was much quicker and a whole lot less complicated and intimidating than I originally thought, Of course it helps to be on friendly terms with your butcher and local delicatessen. I bought my pork belly beautifully prepped and coarsely ground to the required consistency, and my pancetta sliced in overlapping layers onto sheets of non stick paper which made lining my tin a breeze. 

A terrine can be flavoured with any favourite combination of herbs, spices, wine and spirits. There don’t appear to be any hard and fast rules. It’s fun to have a play, but in this recipe I’ve kept to a classic flavour combination spiced with plenty of pepper, nutmeg, cloves and ginger and a good tipple of brandy and white wine. Whatever combination used, it’s always a good idea to take a soupcon of the filling and fry it off for a quick taste test prior to assembling the terrine. This gives you the opportunity to adjust the seasoning and ensure your flavours are perfectly balanced.

Rustic Farmhouse Terrine With Streaky Pancetta and Pistachio

Using a bain-marie  or water bath to bake the terrine insulates against extremes in temperature  and ensures that the terrine is evenly baked and retains a deliciously moist texture. No fancy equipment is required. Just a deep oven proof dish that will comfortably fit your terrine mould. As you can see from the photo I had enough mixture leftover to make two mini taste tester terrines as well. In hindsight I could have packed the meat into the larger mould a little more tightly as when baked the terrine does shrink in size and come away from the sides of its tin. 

The end result was simply gorgeous and beautifully balanced. Devoured by a most appreciative husband with plenty of fresh crusty bread and a spicy beetroot relish. There has even been a request for an encore performance on Sunday week.

Rustic Farmhouse Terrine With Beetroot Relish

A Rustic Farmhouse Terrine.

800 g pork belly mince (ask the butcher to de-bone and remove skin from a 1.2 kg piece of pork belly before coarsely grinding)
250g streaky bacon, very finely diced
250g free-range chicken livers, finely chopped
3 cloves garlic, crushed to a paste
1 large egg
5 or 6 fresh rosemary sprigs, leaves stripped from stems, finely chopped
1 teaspoon white pepper
1/2 teaspoon freshly ground nutmeg
1/4 teaspoon ground cloves
1/4 teaspoon ground ginger
100 ml brandy
1 onion, finely chopped
1 tablespoon olive oil
100 ml white wine
50g shelled pistachio nuts
sea salt and freshly ground pepper, to season
butter, for greasing terrine mould or  loaf tin
150g flat pancetta,very thinly sliced (about 24 slices) to line terrine mould or loaf tin

Prepare The Filling
COMBINE  the mince, bacon, chicken livers, garlic, egg, rosemary, pepper and spices in a bowl.  Season, then stir in the brandy. Cover and marinate in the fridge for at least two hours, overnight is better.
FRY onion gently in a little olive oil until soft and transparent.. Add the wine and reduce over a low heat for a few minutes until it’s thick and syrupy. Set aside to cool.
ADD to the meat mixture with the pistachios. Stir well to combine.The best way to do this is with clean hands.
TAKE a small piece of terrine mix, shape it into a little meatball and fry it until cooked through. Taste and season with a little more more salt, pepper or spices, if required.

Assemble The Terrine
PREHEAT oven to 180C. Select a deep roasting tin that will comfortably fit a 20cm long terrine mould or loaf tin. This will be filled to with water to form a bain marie for the terrine.
GREASE your terrine mould or loaf tin with butter, then line with pancetta slices. A good deli will slice the pancetta for you in overlapping layers onto grease proof sheets which makes this step a breeze. All you have to do is invert each sheet into the mould or tin, press to fit and remove the backing paper, making sure the mould is evenly covered with pancetta. Depending on the length of the slices you may have to save one layer of to cover the top of the terrine. Set aside.
FILL the pancetta lined mould or tin with the terrine mix, pushing it right into the corners.  Bring the ends of the pancetta over the top to enclose the filling. If the ends are too short, cover with another layer of pancetta arranged horizontally over the terrine, tucking in any long ends.

Baking The Terrine
COVER the terrine with foil, then place into the larger roasting tin. Pour enough hot water into the bain-marie to reach 2/3 of the way up the terrine mould or loaf tin. I find this easiest to do with a boiled kettle once the terrine has already been transferred to the oven.
BAKE the terrine in the bain-marie for 45 minutes. Reduce oven temperature to 160 C. Bake for another 20 minutes before testing to see if it is cooked. It will feel firmly cooked when pressed gently in the middle and the tip of a knife inserted into the middle of the terrine is warm to the touch.. If using a meat thermometer; the terrine is cooked when the internal temperature reaches 65C.

Cooling And Compressing The Terrine
REMOVE terrine from both the oven and bain-marie, then place a weight on top of the terrine to compress (a couple of cans are ideal) and cool to room temperature before transferring the terrine and weights to the refrigerator to chill overnight.
NEXT DAY carefully remove the terrine from its mould. Remove and discard any excess jelly before wrapping in several layers of baking paper or cling film. The terrine can be stored in the refrigerator for up to five days and is suitable to freeze.
TO SERVE, unwrap the terrine, slice thickly with a very sharp knife and serve with fresh bread, beetroot relish and cornichons.

Posted in Baked, Pork, Poultry, What I Love to Cook | Tagged , , , , , , , , , | Comments Off on For The Charcuterie Plate. A Rustic Farmhouse Terrine.

Old Fashioned Baking. Little Almond Butter Cakes.

Little Almond Butter Cakes

I do most of my baking in the cooler months, when it’s not too hot to turn on the oven, and cocooned against the elements we’re craving comfort food. Particularly on wet, dreary days when  there’s nothing more inviting than the aroma of something freshly baked wafting through the house at the end of a long, tiring day. It’s at this time of year that good old fashioned baking really comes into its own. Simple and straightforward. Nothing fancy. Just honest, down to earth flavours and textures.

Usually I turn to my faithful standby a butter cake made from staple pantry ingredients, butter, sugar, eggs and flour, scented with a dash of vanilla. Lately I’ve been adding a little almond meal to the mix. Rich and buttery, finished with a scattering of flaked almonds, its the perfect antidote for a dull winter’s day.

Little Almond Butter Cakes

250 g butter, softened
1 teaspoon almond essence
1 cup (220g) caster sugar
4 eggs
3/4 cup (110g) plain flour
3/4 cup (110g) self raising flour
1/3 cup (40g) almond meal
1/4 cup milk
1/4 cup (30g) flaked almonds

PREHEAT oven to 170 C. Position oven racks so the top of the cake tin is roughly in the centre of the oven.
GREASE and flour an 8 hole mini loaf tray or deep 20 cm round cake tin. Line base with baking paper.
BEAT butter, caster sugar and almond essence until pale and creamy, at least 5 minutes. Add eggs, one at a time, beating until just incorporated.
FOLD in sifted flours and almond meal in two batches with just enough milk to achieve dropping consistency. Scrape down mixture from the sides of the bowl with a spatula to ensure the flour is evenly incorporated into the batter
SPOON batter into the mini loaf or cake tin. When filled tap the tin gently on the kitchen bench to distribute the batter and smooth the top with a palette knife.
SCATTER flaked almonds evenly over the top of the cakes for decoration.
BAKE  for 20 –  25 minutes for the mini loaves or 50 – 55 minutes for the larger round cake. A skewer inserted into the cakes should come out clean when perfectly baked. If the flaked almonds on top of the large cake appear to brown too quickly, loosely cover top of cake with a sheet of tin foil and continue baking.
REMOVE from the oven, allow to cool in the tin a little before transferring onto wire rack to cool completely
DUST with a little sifted icing sugar to serve. The cakes will keep in an air tight container for up to three days and is suitable to freeze.

Posted in Baked, Sweet Treats, What I Love to Cook | Tagged , , , , , , , | 4 Comments

Eat, Fast and Live Longer. A 5-2 Fast Diet Recipe Idea Under 100 Calories. Oven Baked Sweet Potato Crisps.

Sweet Potato Crisps

We’re on the cusp of Spring and very much looking forward to the new season’s bounty of garden fresh offerings. For the moment, however, working through the last leg of winter, we’re making do with an abundance of root and cruciferous vegetables. The latest fad chez nous? Veggie crisps. My girls are mad about them at the moment, spending most of their hard earned pocket money on gourmet branded packets of shitake mushroom, sweet potato, beetroot, beans, green radish and carrot. Following last week’s foray into oven dried strawberries they begged me to try my hand at oven baked sweet potato crisps. After all we’d already had great success making  beetroot and kale chips before.

In many ways sweet potato crisps are much quicker and easier to make than oven dried strawberries. They’re sturdier than the delicate fruit and can effortlessly be sliced on a mandolin in minutes before being baked in a hotter 180 C oven for just 20 minutes.

Sweet Potato

I left my sweet potatoes whole and didn’t bother to peel them. Just a quick scrub in the kitchen sink before a thorough drying is all that is really required before slicing as thinly as is practicably possible. Seasoned with a little olive oil and salt, and arranged in a single layer on a baking tray, they’re quickly transformed into intensely flavoured, delicious crisps. Light, crunchy and moreish for just under 100 calories per half cup serve, they’re a perfect fast day indulgence. Enjoyed as a snack, served alongside soup in lieu of croutons, or tossed into a salad to add a little more substance and interest. We’re looking forward to trying out this technique on a whole host of different root vegetables; parsnip, pumpkin, carrot and the already tried and tested sweet potato amd beetroot.

Sweet Potato Slices

Oven Baked Sweet Potato Crisps
Makes 1 1/2 cups (97 calories per half cup serve)

250g sweet potato, whole, unpeeled  (215 calories)
2 teaspoons olive oil (80 calories)
sea salt flakes to season

PREHEAT  the oven to 180 C. Line two large oven trays  with baking paper.
DRIZZLE olive oil into a large shallow bowl. Add 2-3 generous pinches of sea salt. Stir to combine.
WASH and dry sweet potato. Slice finely using a mandolin or very sharp knife. The thinner the better.
PLACE the sweet potato slices into the oiled bowl. Mix well to ensure each slice is coated with a little oil. Then arrange the slices in a single layer over the two prepared oven trays.
BAKE for 20 – 25 minutes using the upper rack positions of your oven. After the first 10 minutes  turn the slices over and rotate the oven position of the trays. The sweet potato will begin to colour and crisp from the outside in. Baking time will vary depending on your oven and the thickness of the slices. After 15 minutes baking time has elapsed, check trays often to make sure the crisps  don’t burn.
REMOVE trays from oven and set aside for 5 minutes. The sweet potato will continue to crisp up as it cools. Store in an airtight container when completely cold.


Posted in Vegetables, Vegetarian, What I Love to Cook | Tagged , , , , , , | 4 Comments

True Comfort Food. Chicken, Veal And Bacon Sausage Rolls.

Chicken,Veal And Bacon Sausage Rolls With Sesame Seeds

It’s been bitterly cold and wet for the last ten days and my family has well and truly embraced comfort food. Soups, braises, curries, mashed potatoes and to top it all off crisp and flaky home-made sausage rolls. Hearty, moreish and very filling there really  isn’t anything dainty about these at all.

When my children were younger I would cut each sausage filled pastry log into bite sized quarters and serve them with tomato relish at birthday parties and family get togethers. As they grew a little older those same logs were cut into half for a more substantial offering. These days I’ve graduated to just baking them whole to satisfy their  teenage sized appetites. No matter the size they always seem to inhale them in just one mouth cramming bite.

The recipe below makes 10 very long sausage rolls, which I hasten to add is probably equivalent to 20 regular sized or 40 party sized rolls. These freeze beautifully once baked and can quickly be heated and crisped up in a hot oven. The extras never ever go astray and often don’t make it to the freezer. For convenience I use store bought square puff pastry sheets. Sliced in half, they are the perfect size to be rolled around a half cup measure of sausage filling. Use any variation of minced meat and herbs that takes your fancy. As a throwback to my children’s toddler days I often also add “hidden” vegetables in the form of a little grated carrot and zucchini. Today I opted for a chicken, veal and bacon version studded with a little pistachio for crunch.  On Australia Day I often pack a patriotic spiced lamb sausage roll for our family picnics.

Chicken,Veal And Bacon Sausage Rolls

Chicken,Veal And Bacon Sausage Rolls
Makes 10 very long, 20 large or 40 party sized sausage rolls

500g chicken mince
500g veal mince
1 tablespoon olive oil
1 small brown onion, finely chopped
250g bacon, finely chopped
2 garlic cloves, crushed
1 carrot, peeled and grated
1 zucchini, peeled and grated
2 sprigs fresh tarragon, leaves stripped from stem and finely chopped
1/3 bunch parsley, leaves stripped from stem and finely chopped
1/3 bunch fresh chives, finely chopped
1 ½ cups fresh breadcrumbs
50g pistachio nuts, coarsely chopped
1 large egg, lightly beaten
sea salt and freshly ground pepper

5 sheets frozen puff pastry, partially thawed, halved
1 egg, lightly beaten, for the egg wash
1/4 cup sesame seeds

PREHEAT oven to 200°C/180°C fan-forced. Line 2 baking trays with baking paper.
HEAT oil in frying pan over medium heat. Add onion, bacon and garlic. Cook, stirring, for 4 minutes until bacon is lightly golden. Remove from heat, stir through the grated carrot and zucchini and set aside to cool a little.
ADD breadcrumbs, pistachios, parsley, tarragon and chives. Stir to combine. Season with a little sea salt and pepper.
CRUMBLE chicken and veal mince into a large mixing bowl. Add the onion-bacon-pistachio-breadcrumb-herb-vegetable mixture together with a lightly beaten egg. Mix until well combined. I like to use clean hands for this step. Season with a little more salt and pepper.
CUT each square pastry sheet in half so you have 10 rectangular sheets
TAKE ½ cup of the mince mixture, form into a sausage shape with your hands, then  place on the long edge of the pastry sheet.  Brush the opposite edge with a little egg wash.
ROLL up pastry to enclose filling. Place roll seam-side down on prepared oven trays
REPEAT with remaining mince mixture, pastry and egg to make 10 extra long rolls. These can be cut in half to make regular sized rolls or quarters to make party sized rolls.
BRUSH the tops of the sausage rolls with remaining egg wash. Sprinkle with sesame seeds.
BAKE for 25 to 30 minutes, swapping trays halfway through cooking time, or until golden and puffed. Stand for 5 minutes before serving. These sausage rolls can be baked and frozen for future use.

Posted in Poultry, Small Bites, What I Love to Cook | Tagged , , , , , , , | 6 Comments

Rich And Decadent. Salted Vanilla Fudge Shortbread Squares.


Salted Vanilla Fudge Shortbread

There’s a serious battle being played out in our kitchen at the moment between the much loved, often requested, traditional chocolate caramel slice and a new contender; a very modern salted vanilla fudge shortbread square. Having baked just one caramel slice too many and wanting to expand on my newly honed fudge making skills, I decided to challenge the status quo by combining a gorgeously creamy fudge with a shortbread biscuit base. Sprinkled with sea salt and sliced into small squares, its a symphony of butter, sugar and cream. Sweet and Salty. Utterly rich and decadent. Proof that you don’t always have to turn to chocolate when you’re craving a sugar fix.

Contrary to popular opinion, perfectly smooth and creamy fudge, made the old fashioned way with pure ingredients is quite easy to achieve once you understand the process and faithfully follow a few key processes.  As summarised in my previous fudge making post in its simplest form a fudge recipe would read something like this:

Combine cream, honey and sugar in a saucepan over medium heat. Stop stirring when the mixture reaches boiling point, but continue  cooking undisturbed until it reaches soft ball stage. Remove from heat, add butter and vanilla. Do not stir or agitate the pan. Once butter has melted pour the mixture into a clean, dry bowl and beat with a wooden spoon until the fudge thickens and loses its gloss. Pour into a greased pan to set.

Of course those instructions are a little sketchy on the pitfalls and nuances of creating perfect fudge. If the  recipe for the salted vanilla fudge topping provided below  looks a little long and daunting,  it’s only because I’ve tried to explain each step along the way. Since I have been following these “rules” I have managed to produce melt in the mouth fudge every single time, no mean feat considering a previous string of fudge making disasters.

Salted Vanilla Fudge Shortbread Squares

Salted Vanilla Fudge Shortbread Squares

Shortbread Base
125g unsalted butter
3/4 cup icing sugar
1 ½ cups plain flour

Salted Vanilla Fudge Topping
4 cups caster sugar
3 tablespoons honey
2 cups pouring cream
125g  butter, diced into small cubes
1 tablespoon pure vanilla essence
2 teaspoons sea salt flakes, for finishing

For The Shortbread Base
PREHEAT oven to 180C
LINE  the base and sides of a 20cm x 20 cm square baking tin with non stick paper, extending paper over sides. This makes removal of the slice from the tin easy when set.
CREAM butter in a bowl until soft. Beat in icing sugar until mixture is light and fluffy.
SIFT flour into mixture and use a spatula or knife to form a soft dough.
PRESS shortbread dough evenly into the base of the prepared tin. Cover with plastic wrap and rub with the back of a spoon to smooth the top. Remove plastic, prick with a fork and chill for 30 minutes.
BAKE for 15-20 minutes or until golden, remove from the oven.

For The Salted Vanilla Fudge Topping
USING a little of the butter grease the sides of a heavy based, minimum 12 cup (3 litre) saucepan. The saucepan needs to hold twice the volume of the sugar and cream to avoid boiling over as the mixture is heated to soft ball stage, and a heavy base to avoid scorching. Buttering the sides helps stop  any residual undissolved sugar crystals from clinging to the sides of the saucepan.
PLACE sugar, honey  and cream into the buttered saucepan and stir well to combine. Cook over medium- high heat stirring constantly until the mixture just begins to boil. At this point all the sugar should be dissolved. Place a tight fitting lid over the saucepan and boil the mixture for just one minute. The steam will help dissolve any residual sugar crystals that may have been thrown onto the sides of the pan while stirring. Remove the lid.
CONTINUE cooking with no further stirring at a steady simmer until the mixture reaches soft ball stage ( temperatures in the 112-115°C range on a candy thermometer). I like to reduce the heat to medium-low and place a simmer mat under the saucepan to prevent the mixture from sticking to the bottom. This step usually takes about 20 -30 minutes at medium-low heat and will entirely depend upon the size and shape of your saucepan, cooking temperature of your stove and humidity of the day. To avoid any crystallisation of the mixture and a grainy fudge, you must resist the urge to stir.
USE a candy thermometer to gauge when temperatures reach soft ball stage but remember that thermometers are not always accurate. After cooking the mixture for about 15 minutes I like to begin testing my fudge to see how close it is to soft ball stage. The old-fashioned way by dropping a small teaspoon of the mixture into a glass of cold water.  The mixture should hold its shape after cooling down a little. If it flattens as it cools, it needs to be cooked for a little longer. If the mixture forms a hard ball the fudge has been taken too far and will seize as it is beaten and cools. It may be possible to rescue the fudge by taking a quarter of cup of the hot fudge mixture, diluting with an equal quantity of chilled pouring cream, then very carefully stirring the mixture back into the fudge without scraping the sides or bottom of the saucepan. Continue to cook until temperature reaches soft ball stage.
IMMEDIATELY remove the saucepan from the heat when the mixture reaches soft ball stage (115 C).
GENTLY add the diced butter and vanilla to the saucepan. Do not stir the mixture or agitate the pan. Allow to sit for five minutes as the residual heat begins to melt the butter.
CAREFULLY pour the fudge mixture into a clean, dry mixing bowl without scraping the sides or bottom of the saucepan. This is important as you do not want to introduce any errant undissolved sugar crystals into the fudge mixture.
BEAT with a wooden spoon or on low speed with an electric mixer until smooth and thick. This will take a good 10 minutes. As it thickens the mixture will lose its glossy shine and become dull and matte. The mixture will continue to thicken as it cools.
POUR mixture over the shortbread biscuit base and allow to cool for 30 minutes before generously sprinkling with sea salt flakes.
ALLOW to cool completely to room temperature before covering with cling wrap and refrigerating for at least an hour to help the fudge set and slicing easier.
TO SERVE, remove from tin using the long sides of the baking paper as handles. Slice as much as you need into 2cm squares. I like to store the remainder of the uncut slice in an airtight container in the fridge for up to a week.

Posted in Baked, Small Bites, Sweet Treats | Tagged , , , , , , , , , | 1 Comment