The 5-2 Challenge. Layering Flavours. Spiced Pumpkin, Orange and Ginger Soup With Gremolata Crumbs

Pumpkin, Orange and Ginger Soup With Gremolata Crumbs

What to eat when you are ravenously hungry on a cold and blustery fast day? Soup. More specifically a non dairy, homemade vegetable based soup. Incredibly low in calories, warming and more importantly filling. Today’s offering? A  Spiced Pumpkin, Orange and Ginger Soup. Layers of flavour at an impressive 95 calories per cup.

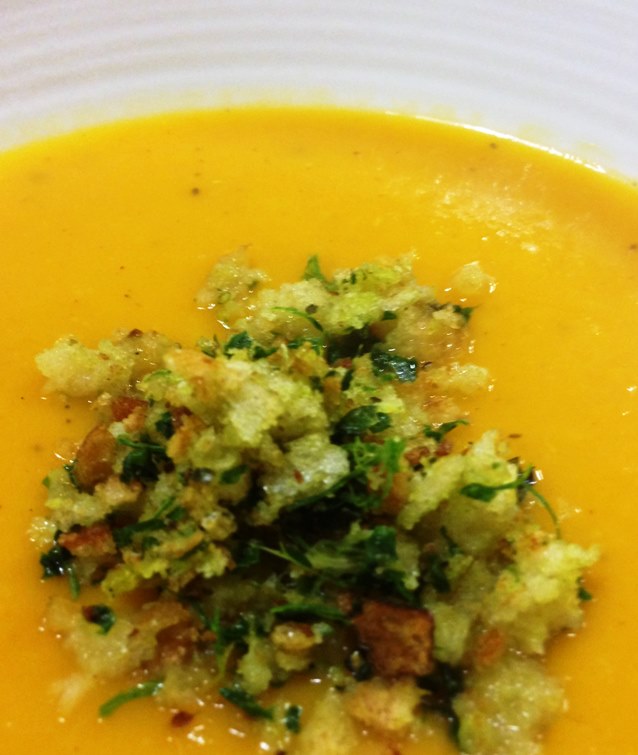
Whole oranges and spices introduce an  interesting first layer of  flavour. Lighter and fresher with a creamy texture without the addition of  heavy cream. My bowl of soup then comes alive with a rather generous sprinkling of zingy gremolata crumbs. My rather modern version incorporates finely minced fresh orange peel, garlic, long red chilli, parsley and sourdough crumbs.

Over the last three or so months I’ve adapted quite a few soups for the 5-2 challenge. One aspect that constantly amazes me is the lower calorie count of a good  homemade soup to its commercial cousin. I’ve perused the packaging of a wide variety of different offerings of soup in the supermarket aisles and am convinced that many must contain calorie laden preservatives and fillers. My most successful fast days seem to be those where I prepare meals from scratch using unprocessed, whole foods. The beauty of making up a large pot of soup? It’s fast and easy. A little goes a long, long way to satisfying those pesky hunger pangs. Make up a large enough batch to ensure there are leftovers. Freeze for an instant fast day meal on those days you are far too busy or preoccupied to cook.

As always here is my latest fast day on a plate.

Breakfast
2 Cups  Tea
4
Mid Morning
Skim Cappuccino
70
Lunch
1 Medium Banana
90
Mid Afternoon
2 Cups Tea
4
Dinner
1 ½ Cups of Spiced Pumpkin, Orange and Ginger Soup with Gremolata Crumbs
1 Cup of Tea with Teaspoon of Sugar
197
18
Total Calories
383

Spiced Pumpkin, Orange and Ginger Soup With Gremolata Crumbs

Makes 10 cups (95 calories per cup plus 36 calories per tablespoon gremolata crumbs)

2 tablespoons of olive oil (240 calories)
2 medium onions, finely diced (92 calories)
2 celery stalks, diced (17 calories)
small knob of fresh ginger, about 1 tablespoon minced (5 calories)
2 cloves of garlic, crushed (8 calories)
2 medium potatoes, peeled and chopped (105 calories)
1 butternut pumpkin, peeled and chopped (190 calories)
2 oranges (124 calories)
6 cups chicken stock (120 calories)
a good grating of nutmeg (10 calories)
2 teaspoons brown sugar (40 calories)
sea salt and pepper

CAREFULLY remove a thin layer of zest from the oranges with a microplane grater making sure to avoid the bitter pith. Divide the zest evenly between two small bowls. One portion will be used for the soup, the other for the gremolata. Set aside.
REMOVE all the white pith from the oranges and discard. Chop the oranges coarsely, removing any pips, and set aside
PLACE a large stockpot on the stove and gently heat the oil.
ADD onions, garlic and ginger. Sauté  without allowing the ingredients to colour. Then add the potatoes,pumpkin,nutmeg and brown sugar. Stir to combine and cook for 2 to 3 minutes.
ADD the coarsely chopped oranges and one portion of orange zest. Stir well to combine.
LASTLY add the stock, bring to the boil and simmer until all ingredients are soft, approximately 30 to 40 minutes.
REMOVE from heat, cool and purée to a smooth consistency in a food processor or with a hand held stick blender.
REHEAT gently to serve. Season to taste and garnish with a good sprinkling of gremolata crumbs.
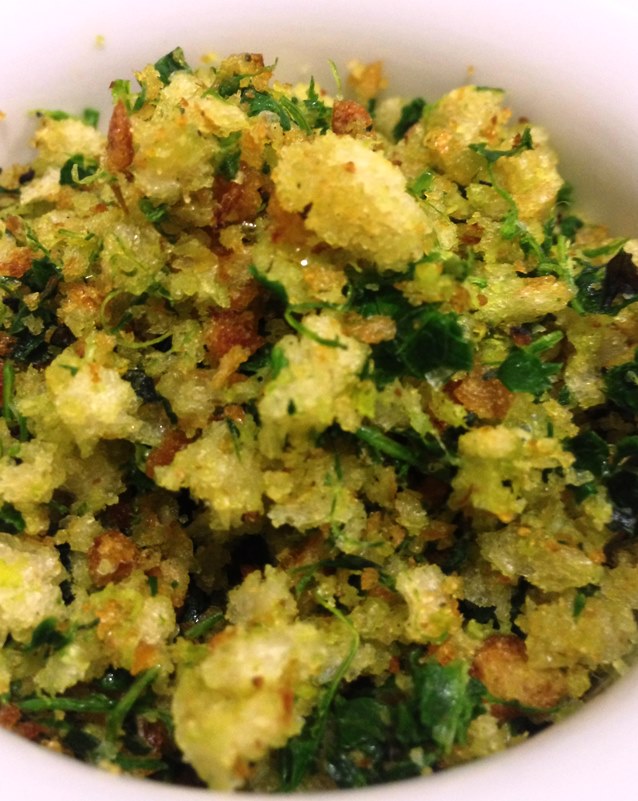
Gremolata Crumbs

Gremolata Crumbs

These gremolata crumbs can be sprinkled on almost any dish to add anothe layer of flavour. I used orange zest in my gremolata to complement the soup but gremolata is traditionally made with lemon zest. Equally delicious either way. The addition of chilli was at the request of my family. They love their food spicy and the heat from the chilli works with the soup. If you prefer you can omit the chilli.

Makes 10 tablespoons (36 calories per tablespoon)

1 tablespoon olive oil (120 calories)
1/2 cup coarse breadcrumbs (210 calories)
zest of 1 orange (6 calories)
1 long red chilli, finely chopped (18 calories)
2 cloves garlic, finely minced (8 calories)
2 tablespoons roughly chopped fresh parsley (2 calories)

HEAT olive oil in a sauté pan over medium-high heat. Add breadcrumbs and salt. Stir to coat in oil. Cook, stirring constantly, until bread crumbs are golden.
ADD zest,chilli and garlic and toss until mixture is very fragrant and bread crumbs are golden brown.
REMOVE from heat. Transfer to bowl and add parsley, stirring to combine.

Posted in Soup, What I Love to Cook | Tagged , , , , , , , , | 7 Comments

Not For The Faint-Hearted. One Pan White Chocolate Chip Caramel Skillet Cookie With A Hot Chocolate Fudge Sauce, Strawberries and Ice Cream.

One Pan White Choc Chip Caramel Cookie

This recipe is not for the faint-hearted. I could feel my arteries hardening as I whipped it up for my hungry teenagers this afternoon. Perfect fare for a wet winter’s afternoon. It’s school holiday time again. The weather is too miserable to venture out. We have had days of lashing rain and king tides. Courtesy no doubt of that pesky supermoon. What to do? Nothing more than cook and eat and take it easy. Granted it’s been an incredibly busy term so they deserve it. Especially my daughter who ventured out at 5.30 am for her regular swim squad session. For the record I only had the merest taste of this giant chocolate chip extravaganza. Not because it didn’t taste amazing, it certainly did, but after more than twelve weeks on the 5-2 diet my sugar cravings seem to have all but disappeared.

Inspiration for this very popular afternoon treat came from Hello Homebody’s excellent post Chocolate Chip Skillet Cookie. I was idly browsing my reader this morning and it caught my teenage son’s attention. A warm giant sized chocolate chip cookie drizzled with hot  chocolate fudge. A true cookie aficionado this was his  idea of heaven. Or perhaps nirvana. Something new and different we had not tried before.

So here is my very first attempt at a skillet cookie. Mixed and baked in one pan using one of our favourite white choc chip and caramel cookie recipes. Quick, easy and versatile. While the cookie baked in the oven I cobbled together a chocolate fudge sauce. To be drizzled over the warm cookie with fresh strawberries and vanilla ice-cream. An incredibly delicious, once in awhile treat. Unless you’re young and athletic.

This slideshow requires JavaScript.

One Pan White Chocolate Chip Caramel Skillet Cookie With A Hot Chocolate Fudge Sauce, Strawberries and Ice Cream.

Serves 4 Hungry Teenagers

115 grams butter
½ cup caster sugar
½ cup brown sugar
1 teaspoon pure vanilla extract
1 egg
1 ½ cups plain flour
½ teaspoon baking soda
¼ teaspoon salt
1 cup white chocolate chips

PREHEAT oven to 180 C.
MELT butter in a 20 cm oven proof skillet over medium-low heat.
STIR in sugars and vanilla until mixture is smooth and well caramelised. Remove from heat. Allow to cool for about 5 minutes.
WHEN skillet has cooled, whisk an egg into the warm butter and sugar mixture.
ADD sifted flour, baking soda, and salt. Stir with a wooden spoon until smooth and well combined. Lastly stir in white chocolate chips.
BAKE  for 15-25 minutes, until golden on the top and around the edges, but still soft in the center.
SERVE straight out of the oven with hot chocolate fudge sauce, strawberries and vanilla ice cream.

Hot Chocolate Fudge Sauce

1 cup pouring cream
1/2 cup, firmly packed brown sugar
2 tablespoons golden syrup
1 tablespoon butter
200g good-quality dark cooking chocolate, coarsely chopped
1 1/2 tsp vanilla extract

COMBINE cream, brown sugar, vanilla, golden syrup and butter in a small saucepan. STIR over medium-high heat and bring to the boil.
REDUCE heat to low and cook, stirring occasionally, for about 5 minutes.
REMOVE from heat and stir in chocolate until melted. Whisk until smooth.

Posted in Baked, Chocolate, Sweet Treats, What I Love to Cook | Tagged , , , , , , , | 4 Comments

The 5-2 Challenge. A Man Sized Fast Day. Seared Salmon Fillet With Lemon, Garlic and Chilli Roasted Cauliflower.

Seared Salmon With Roasted Cauliflower

The guidelines for the fast day diet clearly stipulate that women should not consume more than 500 calories on a fast day. Men have a slightly more generous 600 calorie allowance. The only comment I can make about my latest fast day? It was most definitely a man-sized effort.

I could blame it on the “supermoon”.  After all it is well documented that people do strange things on a full moon and last night’s supermoon was the biggest, brightest  and fullest moon of the year. Or perhaps a better excuse would be the winter solstice. Who isn’t prone to overeating on the  coldest, shortest day of the year? But the simple truth of  the matter is I spent a full weekend celebrating a close friend’s milestone birthday. Eating and drinking from midday Friday well into Sunday. No wonder my Monday fast day was so difficult. My well extended stomach had no idea the party was over and I spent my entire day craving food.

Here is my rather more substantial fast day on a plate. The seared salmon was delicious and definitely filled the rather large hole in my stomach. Paired beautifully with an almost nutty roasted cauliflower. If I had only eaten just half a sandwich for lunch, I would have  kept within my 500 calorie limit. On the bright side with the winter solstice over, the days will be getting longer and hopefully warmer as we begin the long ascent to summer.

Breakfast
2 Cups  Tea
4
Lunch
1 Tomato Sandwich with 20g Avocado
150
Mid Afternoon
2 Cups Tea
4
Dinner
1 Serving Seared Salmon With Roasted Cauliflower
1 Cup of Tea with Teaspoon of Sugar
388
18
Total Calories
564

Seared Salmon Fillet

326 calories to 368 calories per serve depending on whether salmon is wild or farmed

one 170g centre cut salmon fillet per person. (348 calories farmed vs 306 calories for wild salmon)
1/2 teaspoon olive oil (20 calories)
sea salt flakes

REMOVE salmon from the refrigerator ten minutes before cooking. Check the fillet for bones and pinbone if necessary.
HEAT a heavy based frypan over medium-high heat. Add olive oil.
SEASON  the flesh-side of the salmon with salt. When the oil is hot, add salmon skin-side down. Sear until the skin is golden brown and crispy, about 5 minutes. Turn and cook for 1 to 2 minutes more until cooked to your liking. The salmon should still be pink in the middle.
SERVE immediately.

Roasted Cauliflower with Lemon, Garlic and Chilli

Serves 6 (62 calories per serve)

one medium head of cauliflower, washed and divided into florets (146 calories)
2 tablespoons olive oil (240 calories)
juice and zest of 1 lemon (10 calories)
sea salt and freshly ground pepper
1 small red birds-eye chili, deseeded and roughly chopped (5 calories)
2 cloves of garlic very roughly chopped (8 calories)

HEAT oven to  200 C. Line a large shallow roasting tin with baking paper.
USING a pestle and mortar, pound the chili and garlic with a pinch of salt until it forms a paste.
ADD olive oil, mix well to combine and pour over cauliflower. Season well with salt and pepper.
ROAST in the oven for about 30 minutes turning the florets to ensure even roasting after about 15 minutes.
SERVE hot straight out of the oven.

Posted in Seafood, What I Love to Cook | Tagged , , , , , , , | 3 Comments

A Lazy Sunday Night Dessert. Orange Scented Chocolate Self-Saucing Pudding

Chocolate Self Saucing Pudding

This much loved chocolate pudding is so easy it’s child’s play. Perfect for a chilly evening when you’re craving a quick chocolate fix but really can’t be bothered to go to much effort at all. Rich, chocolate-y and lush it’s ready in no time. A lazy Sunday night dessert.

An express pudding. It only takes about five minutes to prepare and the results are awesome. One of those old fashioned puddings my mother used to bake for me,  I baked for my children when they were younger, and better still they now very obligingly bake for themselves. They’re fascinated by  the process. The transformation of  boiling hot water poured over a simple cake batter sprinkled with sugar and cocoa into a delicious  self saucing dessert. As the pudding cooks it separates into a fluffy chocolate sponge layer with a smooth chocolate sauce underneath. I’m sure every family has its own recipe but this is the one we know and love.

Orange Scented Self-Saucing Chocolate Pudding

Serves 8

For the Batter
1 1/4 cups self raising flour
1/2 cup caster sugar
1/2 cup cocoa powder
1/2 teaspoon baking powder
1 cup  milk
80g unsalted butter, melted
2 eggs, lightly beaten
finely grated zest of 1 orange

For the Sauce
1/2 cup cocoa powder
3/4 firmly packed cup brown sugar
1 1/2 cups boiling water

thickened cream or ice cream (optional), to serve

PREHEAT oven to 180 C. Grease a 6 cup capacity oven proof dish.

For the Batter
PLACE flour, caster sugar, baking powder, cocoa powder and a pinch of salt into a bowl.
COMBINE milk, butter, egg and orange zest in a jug. Add to the dry ingredients beating with a wooden spoon to combine. Pour the batter into the prepared dish.

For the Chocolate Sauce Layer
COMBINE the brown sugar with the remaining 1/2 cup cocoa powder in a small bowl. Sprinkle evenly over the pudding batter.
CAREFULLY pour 1 1/2 cups boiling water from a kettle over the pudding, over the back of a spoon to break the flow.

BAKE for 35 minutes or until the pudding is just set with a slight wobble in the centre. Serve hot from the oven with cream or ice-cream.

Posted in Baked, Chocolate, What I Love to Cook | Tagged , , , , , | 4 Comments

The 5-2 Challenge. A Japanese Inspired Noodle Bowl. Spicy Chicken Soba Noodle Soup With Broccolini and Spinach

Spicy Chicken Soba Noodle Soup

There is something about the colder weather that makes me want to comfort eat. On the menu for my latest recent fast day a Japanese inspired Spicy Chicken Soba Noodle Soup. Nourishing. Filling. Warming. Unfortunately my fast day resolve was sorely tested by a batch of leftover homemade crumpets. Or more specifically the aroma of them being toasted as an after school snack.  My afternoon treat? Half a crumpet with my cup of tea. The damage wasn’t too bad taking me only a little over my daily 500 calorie limit. Mindful eating in action. On any other day I’d probably eaten two. With lashings of butter and jam.

Breakfast
2 Cups  Tea
4
Lunch
1 Small Banana
72
Mid Afternoon
½ Homemade Crumpet
45
1 Cup of Tea
2
Dinner
1 Serving Spicy Chicken & Soba Noodle Soup
1 Cup of Tea with Teaspoon of Sugar
377
18
Total Calories
518

Spicy Chicken Soba Noodle Soup With Broccolini and Spinach

Serves 6 ( 377 calories per serve)

1  270g packet dried soba noodles (960 calories)
1 tablespoon olive oil (120 calories)
1/2 bunch long green spring onions, chopped (45 calories)
1 tablespoon peeled and minced fresh ginger (5 calories)
1 clove garlic, minced (4 calories)
1 long red chilli, minced (18 calories)
1 bunch broccolini, trimmed and cut on the diagonal into bite size pieces (71 calories)
1 large carrot, peeled and julienned (40 calories)
6 cups chicken stock or broth (I used Campbell’s Real Stock) (126 calories)
2 tablespoons soy sauce (18 calories)
1 teaspoon mirin (5 calories)
a few drops of Asian sesame oil (10 calories)
500g  chicken breasts, poached and shredded (recipe follows) (825 calories)
2 cups baby spinach leaves, washed and shredded (14 calories)

IN A LARGE saucepan, heat olive oil over medium heat. Add spring onion and saute until soft and translucent.
ADD the ginger, chilli and garlic and sauté for about a minute to release their flavour, being careful not to let the garlic burn.
ADD broccolini and carrot and saute for a minute or two until well coated.
ADD the stock,soy sauce and mirin. Bring to the boil. Season to taste.
MEANWHILE bring a saucepan of water to a boil, add the noodles and cook until just tender, about 4 minutes. Drain and set aside until needed.
ADD the  shredded spinach and poached chicken to the soup. Cook until just heated through to a slow simmer.
DIVIDE the soba noodles among six warmed bowls.  Ladle soup over the noodles and  serve immediately.

For the Poached Chicken

2 large boneless skinless chicken breasts, about 500 grams
1 1/2 – 2 cups chicken stock or water
1 bay leaf
1/2 teaspoon whole peppercorns

PLACE chicken breasts in bottom of a small saucepan in a single layer.
COVER with broth or water. Add peppercorns and a bay leaf. Bring to a boil, then quickly reduce heat to low so that the water is barely at a simmer.
PARTLY cover and gently simmer for 10 minutes. Turn off heat completely, and allow chicken to remain in hot poaching liquid for 15-20 minutes.
WHEN ready to use remove from the cooled poaching liquid and shred.

Posted in Poultry, Soup, What I Love to Cook | Tagged , , , , , , , , | 1 Comment

Winter Weekend Warmers. Perfect Crumpets and a Cup of Tea.

The Perfect Crumpet

A few days ago I caught up with a girlfriend at a local cafe. On the menu? Homemade crumpets. Perfect with a cup of tea. Particularly so on a miserable wet winter’s day. I’d never eaten homemade crumpets before and wasn’t disappointed. They were amazing. Light and fluffy with crispy bottoms. Toasted to perfection. Generously drizzled with cultured butter and wild honey.

One of my daughters adores crumpets. I occasionally purchase them for her from the supermarket. Gauging whether they are fresh is a bit hit and miss. They are tightly wrapped in cellophane and more than once I’ve taken them home, only to unwrap them to toast them for breakfast and find them speckled with flecks of mould. They’re tossed into the bin and invariably I vow I’ll never buy them again.

Those cafe crumpets were so fantastic they spurred me on to research crumpet making at home. Where to find a great crumpet recipe? From the Brits of course. Crumpets are traditional British fare and I was lucky enough to come across a great article from the Guardian titled How to Cook The Perfect…Crumpet. 

In reality crumpets are nothing more than oversized, yeasted pikelets. Learning to make pikelets was almost a rite of passage when I was growing up. Home economics 101. And so it transpired that on another dreary, chilly winter’s day I made my first ever batch of crumpets. Not difficult at all.

The making is quick and easy, the hardest part is remembering to start the batter an hour or so before its needed to allow the yeast to work its magic. The addition of bicarbonate of soda to the batter at the end gives the crumpets their distinctive bubbly, honeycomb appearance. I used metal food presentation rings to cook the crumpets. Once upon a time I’m sure there were such things as crumpet rings, but I’m sure egg rings would work equally well. If the rings are well greased with butter the crumpets will slide off easily when cooked.

Thanks to the Guardian for a foolproof recipe. My daughter’s verdict? Amazing. So much better than the store bought ones.

The Perfect Crumpet
Adapted from  an article in The Guardian. How To Cook The Perfect…Crumpet 

Makes about 8 crumpets

1 teaspoon sugar
200ml whole milk
100ml boiling water
1 tablespoon dried yeast
1 cup (150g) strong white bakers flour
2/3 cup (100g) plain flour
1 teaspoon salt
½ teaspoon bicarbonate of soda
50 ml warm water
20g butter, melted for cooking

MIX the sugar, milk and boiling water in a jug and stir in the yeast. Leave in a warm place for 15 minutes until frothy.
COMBINE the flours in a large mixing bowl with the salt. Stir in the liquid and mix vigorously until smooth. Cover and leave in a warm place for between one-and-a-half and two hours until the batter is a mass of tiny bubbles.
MIX the bicarbonate of soda with 50ml warm water and stir it into the batter. Cover and stand in a warm place for 30 minutes.
MELT the butter and use it to brush the inside of four crumpet rings. Heat a large frying pan on a medium-low heat and grease the pan. Put the rings flat into the pan and ladle a spoonful of batter into each, so they are about half full.
COOK until mixture bubbles, small holes form on the surface and a skin forms on top (4-5 minutes).
REMOVE rings, turn crumpets and cook until light golden (1 minute). Keep crumpets warm in a tea towel while you repeat with remaining batter, thinning with a little extra milk if necessary. If the batter is too thick, the holes won’t be able to force their way through to the top, add too much liquid and batter will run out from under the rings.
SERVE warm immediately or toasted the following day.

Posted in Baked, Breakfast, Sweet Treats, What I Love to Cook | Tagged , , , , , , , | 9 Comments

The 5-2 Challenge. Exploring New Food Trends. Kimchi and Korean Style Fried Rice With Egg Omelette.

Kimchi Fried Rice

Today’s 5-2 challenge focus? Transforming simple meals into something amazing by introducing new flavours.  One of the hottest new food trends of the year is kimchi. A traditional Korean fermented pickle that’s crunchy, sour, sweet, salty and spicy. Its flavour is complex and definitely has umami. That elusive fifth taste. Utterly delicious and more than a little addictive. Conventionally made with cabbage, carrot and green onion. Salted. Brined.  Combined. With with the holy trinity of chilli, garlic and ginger. And a dash of fish sauce for good measure. Traditionally aged underground in earthenware jars.

Kimchi is often referred to as Korea’s national dish and is served with almost every meal. It can be served on its own as a condiment or side salad, but it is also used extensively to flavour  a variety of dishes;  fried rice, stir-fry, noodles, sandwiches and even pizza. Here in Australia kimchi is readily available at good Asian grocers, but is not that difficult to make.

With a whole head of cabbage in my refrigerator courtesy of my father’s winter garden I thought I’d give making it a go. Googling kimchi I came across a rather quick and simple recipe at Epicurious.com. My recipe is loosely based on this taking into account what was on hand in my pantry this morning. Most kimchi recipes incorporate gochujang, a Korean style fermented chilli paste, or red pepper flakes. Both of which I am sure are also available at a good Asian grocer. Of course neither of these ingredients are staples in my pantry. So more improvisation was the order of the day, and  have included my cobbled together recipe for a substitute hot chilli paste.

Notwithstanding the liberties I have taken in producing my  first ever batch of kimchi, the result was sensational and received a big tick of approval from my appreciative family. I used the kimchi in a simple Korean styled fried rice dish with egg omelette.    Delicious. Satisfying. A real fast day treat.

Here is my day on a plate, The chicken breast was an unintended extra. I’d roasted a free range chicken to round out my family’s meal. Once carved I couldn’t resist sampling a slice. Or two. Thankfully this time it didn’t take me over the daily 500 calorie limit. And as an aside. I use basmati rice as it has a lower calorie count than other varieties.

Breakfast
1 Cup of Tea
2
Lunch
Skim Cappuccino
70
Mid Afternoon
2 Cups of Tea
4
Dinner
1 Serving Kimchi Fried Rice
324
50 grams Roast Chicken Breast
82
1 Cup of Tea With Sugar
18
Total Calories
500


Kimchi Fried Rice With Egg Omelette.
Makes 6 generous servings (324 calories per serve)

2 tablespoons  sesame oil (240 calories)
4 eggs, lightly beaten (300 calories)
5 cups cold, cooked basmati rice (900 calories)
3 cups kimchi, chopped (with its juices) (390 calories) (recipe follows)
1 tablespoon gochujang (Korean fermented chilli paste) or hot chilli paste substitute (35 calories)(recipe follows)
4 long green spring  onions, thinly sliced, plus 1 long green spring onion sliced on the diagonal as garnish (75 calories)

HEAT  oil into a wok or large sauté pan, over medium heat.
POUR egg into the pan and gently but quickly cook, stir to break apart into large pieces.
ADD rice. Sauté for a further 3 – 5 minutes or until rice is warmed through.
ADD  prepared kimchi, its juices and the gochujang or chilli paste to the pan.
STIR together until all the rice has been well coated, about 3 to 4 minutes.
STIR in the spring onions and and remove from heat. Season to taste.
SPOON into warm serving bowls. Garnish with the remaining spring onions.

Hot Chilli Paste: A Substitute for Gochujang (Korean Style Fermented Chilli Paste)

Makes approximately 3 tablespoons; use 2 tablespoons for kimchi and remaining tablespoon for the fried rice. (35 calories per tablespoon)

3 (about 80g) fresh long red chili peppers (trimmed of stems, seeded if desired) (54 calories)
1 tablespoon sugar (45 calories)
1 tablespoon  fish sauce (6 calories)
1/2 tablespoon sea salt

PLACE long red chillies, sugar, fish sauce and one tablespoon sea salt into the bowl of a small food processor. Process until smooth. Season to taste.

Quick Korean Kimchi
(Loosely based on a recipe from Epicurious.com)

Makes about 4 cups (130 calories per cup)

1 small head cabbage (176 calories)
1/4 cup sea salt flakes
2 cloves garlic, minced (8 calories)
1/4 cup water
1 tablespoon toasted sesame oil (120 calories)
4 tablespoons  rice wine vinegar (100 calories)
2 tablespoons gochujang (Korean style fermented chilli paste) or substitute homemade hot chilli paste (recipe follows) (70 calories)
2 teaspoons fresh ginger, finely grated (4 calories)
3 long green spring onions sliced (15 calories)
1 carrot, peeled and grated (25 calories)

REMOVE outer leaves from the cabbage, quarter and remove the core. Slice cabbage into 2cm chunks. Place in a colander, add sea salt and mix well. Cover and drain over a bowl until just wilted, about an hour.
RINSE wilted cabbage and combine with garlic and water in a large saucepan. Bring to the boil over high heat. Reduce heat to medium-low and cook, stirring once or twice, until tender, 4 to 5 minutes. Drain well and allow to cool.
WHISK together vinegar, sesame oil, ginger and two tablespoons of the chilli paste in a bowl.
ADD cabbage, spring onions and carrots. Toss well to combine. Season to taste. Cover with glad wrap and refrigerate for at least 30 minutes before using.

Posted in Marinades, Pastes and Dressings, Rice, What I Love to Cook | Tagged , , , , , , , , | Comments Off on The 5-2 Challenge. Exploring New Food Trends. Kimchi and Korean Style Fried Rice With Egg Omelette.

Simple Cheese Making at Home. Warm Breakfast Bruschetta With Fresh Ricotta and Honey.

Breakfast Bruschetta With Ricotta and Honey

One of life’s simplest pleasures is creamy fresh ricotta. Served warm straight from the vat. I was reminded of this a couple of weeks ago when I visited one of my favourite artisan cheeses stores. I purchased a kilo of freshly made ricotta a key ingredient in my  baked pumpkin and ricotta rotolo. Of course I  couldn’t resist sampling it Nigella style straight from its container when I arrived  over home. One of my favourite ways to enjoy fresh ricotta is piled high on a toasted sourdough fruit bread. Drizzled generously with honey. Breakfast bruschetta. Perfect for Sunday brunch.

This Sunday I used thick slices of apple and currant sourdough bread for my bruschetta. Courtesy of my friendly local baker. Unfortunately there is no cheesemaker in our neighbour so drawing on an earlier conversation with my aunt I decided to make my own ricotta. Using a very simple recipe and three ingredients, a two litre bottle of full cream milk, a pinch of salt and the juice of a freshly squeezed lemon.  No special equipment required.

Ricotta literally means “recooked”. True ricotta is a fresh unripened Italian cheese made not from whole milk but the whey left over from the production of other cheeses. The whey is fermented for 12 -24 hours, reheated and thick curds skimmed from the pot. Fortunately ricotta  can easily be made at home simply by adding a little acid to fresh whole milk.

It’s a straightforward and uncomplicated process. Heat milk to near boiling point, separate the milk into curds and whey by adding  acid; lemon juice, vinegar or even yoghurt. Strain anywhere from five to twenty minutes using a cheesecloth or perhaps a clean chux superwipe cloth as I did. Straining removes excess moisture from the curds. A soft, creamy texture requires only a few minutes, whilst a firmer, drier ricotta needs more time. And there you have it warm, creamy ricotta. Ready to be devoured in less than half an hour. For a rich and creamy dessert style ricotta suitable to be used as a filling for cannoli, cassata, or cream puffs, substitute  a cup or two of the whole milk with cream. This variation is much richer and definitely more decadent.

We always have a tub of ricotta in our refrigerator. I use it for both sweet and savoury cooking. Now I know the secret to making ricotta at home there will be no excuse for not making fresh home-made curds. They really do taste amazing. So much nicer than the commercial variety.

This slideshow requires JavaScript.

Warm Breakfast Bruschetta With Fresh Ricotta and Honey

Toast thick slices of a good fruit, sourdough bread. Top each slice with a generous tablespoon or two of warm fresh home-made ricotta and a generous drizzle of honey.

Fresh Homemade Ricotta

Makes about 2 cups

2 litres full cream milk
3 tablespoons lemon juice or vinegar
a generous pinch of salt

LINE a large strainer with a few layers of cheesecloth (or clean chux superwipes). Set over a large bowl if you wish to reserve the whey.
RINSE the inside of a non reactive pot (stainless steel or enamelled) with cold water to help prevent the milk from catching to the bottom and scorching.
PLACE the milk in the rinsed  pot. Add salt and stir briefly. Allow milk to heat slowly, stirring occasionally. Steam will start to form above the surface and tiny bubbles appearing on the surface of the milk when it is near boiling point. This will read between 75 C – 95 C  on a thermometer, just before the milk comes to a boil. Stir occasionally to prevent a film from forming or any from sticking to the bottom. It may be easier to use a thermometer the first few times you make ricotta.
ADD the lemon juice, one tablespoon at a time, stirring between each addition. The mixture should separate quite quickly into curds and whey .Remove from the heat and let sit for another minute to allow the curds and whey to fully separate.
CAREFULLY ladle the curds with a  slotted spoon into the lined strainer. Allow to drain for a minute or so. Tie up the ends of the cheesecloth to form a bundle. Hang the cheesecloth bundle over a bowl. Strain it for 5 to 20 minutes, until you achieve the desired consistency.  A very soft and creamy cheese requires only a little straining, while  a drier and firmer cheese requires more time.
PLACE in a tight sealed container. Refrigerate. It will keep for up to 7 days. Ricotta does not freeze well.


Posted in What I Love to Cook | 5 Comments

More Sunday Night Baking. Butter Swirls With Plum Jam and Almond Meal.

Butter Swirls With Plum Jam and Almond Meal

Take a very simple vanilla butter biscuit dough. Spread with plum jam and scatter with almond meal. Roll up swiss roll style. Slice and bake. The result? A gorgeous, very moreish biscuit. Short, buttery and delicious. Sometimes I use raspberry jam and coconut or nutella and hazelnut meal. This time I had a jar of my mother’s home-made plum jam and thought I would put it to good use.

Butter Swirls With Plum Jam and Almond Meal

Makes about 30 biscuits

2 1/2 cups plain flour, plus more for dusting
1 teaspoon coarse salt
1/2 teaspoon baking soda
1 cup (225g) unsalted butter, softened
1/2 cup granulated sugar
1/2 cup packed light-brown sugar
2 large eggs
1 teaspoon vanilla
6 tablespoons plum jam
4 tablespoons almond meal

SIFT together flour, salt, and baking soda into a bowl. Set aside.
CREAM butter and sugars together in a large bowl using an electric beater. Mix on medium speed until smooth, about 3 minutes. Add eggs and vanilla. Beat until just combined.
REDUCE speed to low; gradually add flour mixture. Divide dough in half and bring together into a ball. Wrap each ball of biscuit dough in plastic. Refrigerate until firm, about 1 hour or overnight.
REMOVE dough from the refrigerator.  Place each  ball on a lightly floured strip of baking  paper. Roll out into a 30cm x 20cm rectangle. Trim edges neatly with a sharp knife.
PLACE baking paper and rolled out dough onto two oven trays. Refrigerate for 30 minutes.
REMOVE the trays from the fridge. Spread three tablespoons of plum jam over each rectangle of biscuit dough. Scatter two tablespoons of almond meal over each. Starting with the long side, roll the biscuit dough swiss roll style into two logs. Wrap each log in plastic; refrigerate until firm, about 1 hour or overnight.
WHEN ready to bake Preheat oven to 180 C. Remove logs from the refrigerator and cut into 2cm thick slices using a sharp knife. Place on paper lined baking trays.
BAKE the biscuits until the edges turn golden brown, about 15 minutes, rotating the trays about half way through. Allow to cool a little on the baking trays before transferring to wire racks to cool completely. The biscuits and jam filling will harden as they cool.

Posted in Baked, Sweet Treats, What I Love to Cook | Tagged , , , , , , | 1 Comment

Love Them or Loathe Them. Defending a Much Maligned Vegetable. Brussels SproutsTossed With Toasted Breadcrumbs.

Brussels Sprouts With Toasted Breadcrumbs

I have a confession to make. I adore Brussels Sprouts. Always have. Unfortunately most of my family do not share my passion for this much maligned vegetable.  In our house we always try to eat seasonally. It’s winter and These beautiful, small, tightly furled, bright emerald green nuggets of sweet and nutty deliciousness are in plentiful supply  at the markets. I could eat them by the plateful. Over the years my family have learnt to tolerate them and I suspect perhaps even begrudgingly enjoy them.

We have all heard the stories of soggy, waterlogged Brussels sprouts heaped onto the plate in a grey, unappetising mass. Overcooked with a lingering sulphuric odour. Fortunately I have never had to endure them prepared in this way. My experience has always been much brighter. In defence of the much maligned Brussel sprout here is a very simple family recipe that brings out the best of this misunderstood and often ill prepared vegetable. Cooked until just al dente and  tossed with toasty, golden breadcrumbs. Its well worth trying.

Brussels Sprouts Tossed With Toasted Breadcrumbs.

500g Brussels sprouts, trimmed
1 tablespoon butter
1 tablespoon olive oil
1 clove garlic, peeled and minced
1⁄4 cup dry bread crumbs
Salt and freshly ground black pepper

CUT or pull off any dry outer leaves from the brussels sprouts. Trim away any spots, and slice off the dry stem end. Cut a very small, barely discernable  X  into the stem of each brussels sprout.
BRING a large pot of salted water to the boil over high heat. Add Brussels sprouts and simmer until the sprouts are al dente; bright green and tender and just about cooked through, about 3-5 minutes. Drain well in a colander. Set aside.
MELT butter and oil in a large heavy-bottomed skillet over medium heat. Add breadcrumbs and garlic and cook stirring often until breadcrumbs are a deep golden brown. Season generously with sea salt and pepper.
TRANSFER cooked and well drained brussel sprouts to a warm serving platter. Scatter generously with the toasted bread crumbs. Toss well to combine. Serve.

Posted in Vegetables, Vegetarian, What I Love to Cook | Tagged , , , , , , | 2 Comments