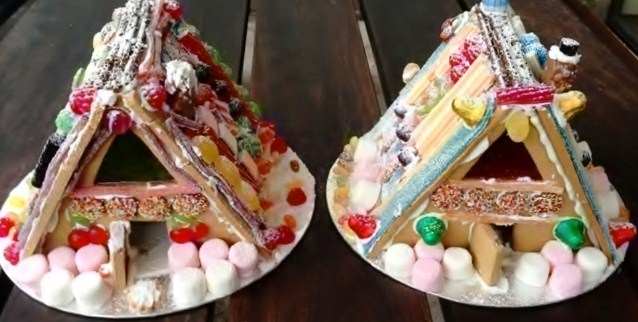
My girls love decorating gingerbread houses. Its something of an early December, start of school holidays ritual. A celebration of the festive season with friends. The problem is that here in the Southern hemisphere Christmas coincides with summer. Hand in hand with hot, humid weather and if you’re not careful armies of ants!
I remember the year we first started making gingerbread houses. The girls must have been about four. I dutifully made a traditional sticky soft gingerbread. Assembled it ready for decorating. Left it out to dry. Two hours later it was covered. Not by lollies and icing. Something else entirely. A colony of swarming ants. Needless to say that early attempt at a gingerbread house was consigned to the bin. I whipped up a batch of shortbread to decorate instead.
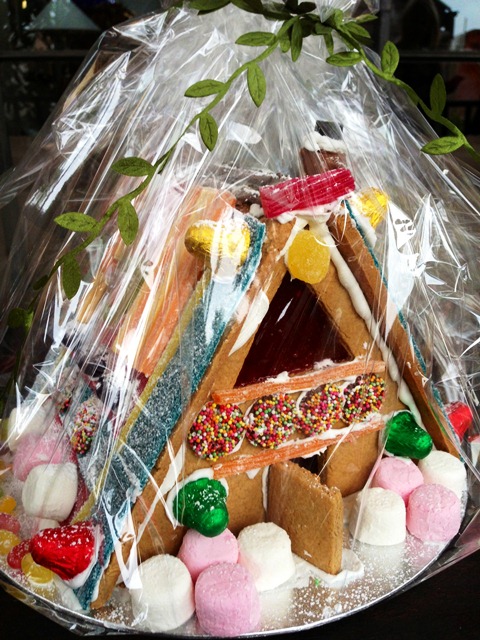
These days I use a lemon scented gingerbread cookie dough to make our houses. Perhaps not so traditional. But it works in our climate. Time poor I don’t want to feel like I’m building the house from hell. So I like to create my houses from a very simple template. Four panels all up. Two 20 cm squares for a chalet style roof. Two 20 cm equilateral triangles for the walls. Cut from cookie dough rolled to a 7 cm thickness for sturdiness. Glued together on a cake board with royal icing. Works every time. This year we added stained glass windows by stamping shapes into the triangular panels just before they went into the oven and filling those shapes with crushed boiled lollies. In a word. Awesome.
And this year there was an extra special surprise. Before positioning the roof I placed a Christmas tree cookie baked from leftover scraps of dough inside the house. Standing proud on a liquorice all sort stand. Surrounded by rock candy presents. This was a nod to last year’s not so glamorous “surprise”. A forgotten plastic measuring cup that had been supporting a non co-operative collapsing wall in the assembly stage.
The girls spent a whole afternoon decorating these houses with their friends. I swear there are three layers of lollies on some of those panels. Here is Lexi and Cam’s house. All dressed up for Christmas.
Lemon Scented Gingerbread House With All the Trimmings
For One House With Stained Glass Windows
- cardboard gingerbread house templates
- one quantity of Lemon Scented Gingerbread Cookie dough
- two quantities of icing – for construction of the house and decoration
- one 30 cm round cake board
- selection of assorted lollies for decoration. We used liquorice all sorts, sour straps, candy canes, chocolate freckles, jubes, orange sticks, yoghurt covered pretzels, musk sticks, jelly bellies, boiled lollies and marshmallows.
- chocolate bar for the chimney. We used a Picnic bar.
- cellophane and ribbon to wrap
Gingerbread House Templates
Take one sheet of cardboard and cut into one 20 cm square and one 20 cm equilateral triangle. These are the templates that will be used to cut the house panels from the cookie dough. Two squares will form the chalet style roof and two triangles the supporting walls.
The square was a snap. But I had to brush up on my geometry for the triangle. For an equilateral triangle all three sides are of equal length, as are the degrees of all the angles. Cutting a 20 cm square in half on the diagonal does not work. I know. I tried it.
Here is a very basic method to draw any sized equilateral triangle with only a pencil, ruler and one sheet of paper. It really works. Thank you Year 7 maths. I was so impressed with the easy logic I’ve summarised it below. After all know I will be referring back to this next year.
For a 20 cm equilateral triangle.
- Draw a 20 cm base line using a ruler. Divide the length by two. The mid-point of the base line is 10 cm.
- At the 10 cm mid-point, draw a line at least 25 cm long perpendicular to the base. This is the perpendicular bisector.
- Align the zero mark on the ruler with one end of the 20 cm base line
- Rotate the ruler until a line measuring 20 cm touches the perpendicular bisector.
- Draw the line, and then repeat this process to draw the third line. You now have a triangle with three equal sides and three equal angles, or an equilateral triangle.
Lemon Scented Gingerbread Cookie Dough
175 g butter
1 cup (175 g) soft dark brown sugar
3 tablespoons of treacle
4 2/3 cups (700 g) plain flour, plus extra for dusting
1½ tsp bicarbonate of soda
2 tsp ground ginger
2 tsp mixed spice
1 tsp cardamom
1 tsp ground cinnamon
zest and juice (about 50 ml) of 1 lemon
2 medium free-range eggs
1 packet of boiled sugar lollies for the stained glass centres, I used Lifesaver Five Flavours
PREHEAT the oven to 180 C. Line four baking trays with baking paper.
REMOVE lolly wrappers and separate lollies by colour. Use a mallet to lightly crush into pieces.
PLACE butter, brown sugar and treacle into a pan over a very low heat, stirring until the butter and sugar have melted. Set aside to cool.
MIX the flour, bicarbonate of soda, spices and lemon zest in a big bowl.
BEAT eggs in a separate bowl.
ADD the butter mixture, eggs and lemon juice to the flour. Mix well, then use your hands to bring the dough together.
SPRINKLE a little flour over a clean work surface and knead the dough for a few minutes until smooth.
DIVIDE the dough into 4 discs. Each disc will be used to cut out one of the four house panels – two 20 cm squares for the roof and two 20 cm equilateral triangles for the sides,
For each disc repeat the following:
PLACE disc between two large sheets of baking paper and roll to 7 mm thickness.
CUT out one of the four house panels.
TRANSFER the panel to a lined baking tray.
FOR the equilateral triangle panels only. After transferring the panel to the tray, use a small cookie cutter to cut a shape into the centre of the upper half of the triangle. Fill with crushed boiled lollies. This will form the stained glass window of your house. Also cut out a door from one of the triangles only.
BAKE the 4 panels and 1 door for about 20 minutes. The lolly centres should be melted and bubbling and the panels just barely beginning to brown.
REMOVE the baking trays from the oven and place on wire racks to cool. Allow the panels to cool completely on the trays to allow them to harden and lolly centres to set.
KNEAD together any leftover cookie dough scraps and use to make cookies. Once rolled and stamped out the cookies will require baking for 8 – 10 minutes.
Icing
2 egg whites
3¼ cups pure icing sugar, sifted
½ teaspoon lemon juice
BEAT the egg whites in a small bowl with an electric mixer until just frothy, gradually beat in enough sifted icing sugar until the mixture forms stiff peaks, stir in juice.
KEEP icing covered with plastic on the surface to prevent drying.
Assembly of the Gingerbread House
SPREAD a thin layer of icing on the board as a non-slip base.
SPOON icing into a piping bag.
ASSEMBLE the gingerbread house on the board, using the icing to secure pieces together. Start with the triangular walls. When secure, pipe along all joins, then add the square roof panels.
POSITION the door in place with icing.
CUT the base of a chocolate bar (we used a Picnic bar) at an angle to represent a chimney. Join the chimney to house with icing.
DECORATE the house with lollies, attaching with icing.
DUST all over with sifted icing sugar to represent snow.
WRAP in cellophane when dry and tie with festive ribbon.


I am impressed with your dedication to the art og gingerbread, bravo!
Thanks. All credit to the girls and their friends.
Great post! 🙂 the houses are very pretty!
Glad you think so. It was fun watching the girls decorate them. Maybe next year they can read the post and make them from scratch! That will keep them occupied!
WOOOOOOOOOOOW :I) that looks deliciously awesome. 🙂
I just want to eat them! 🙂